All Page Tutorial — Using Elementor
1. Locating the Page in WordPress
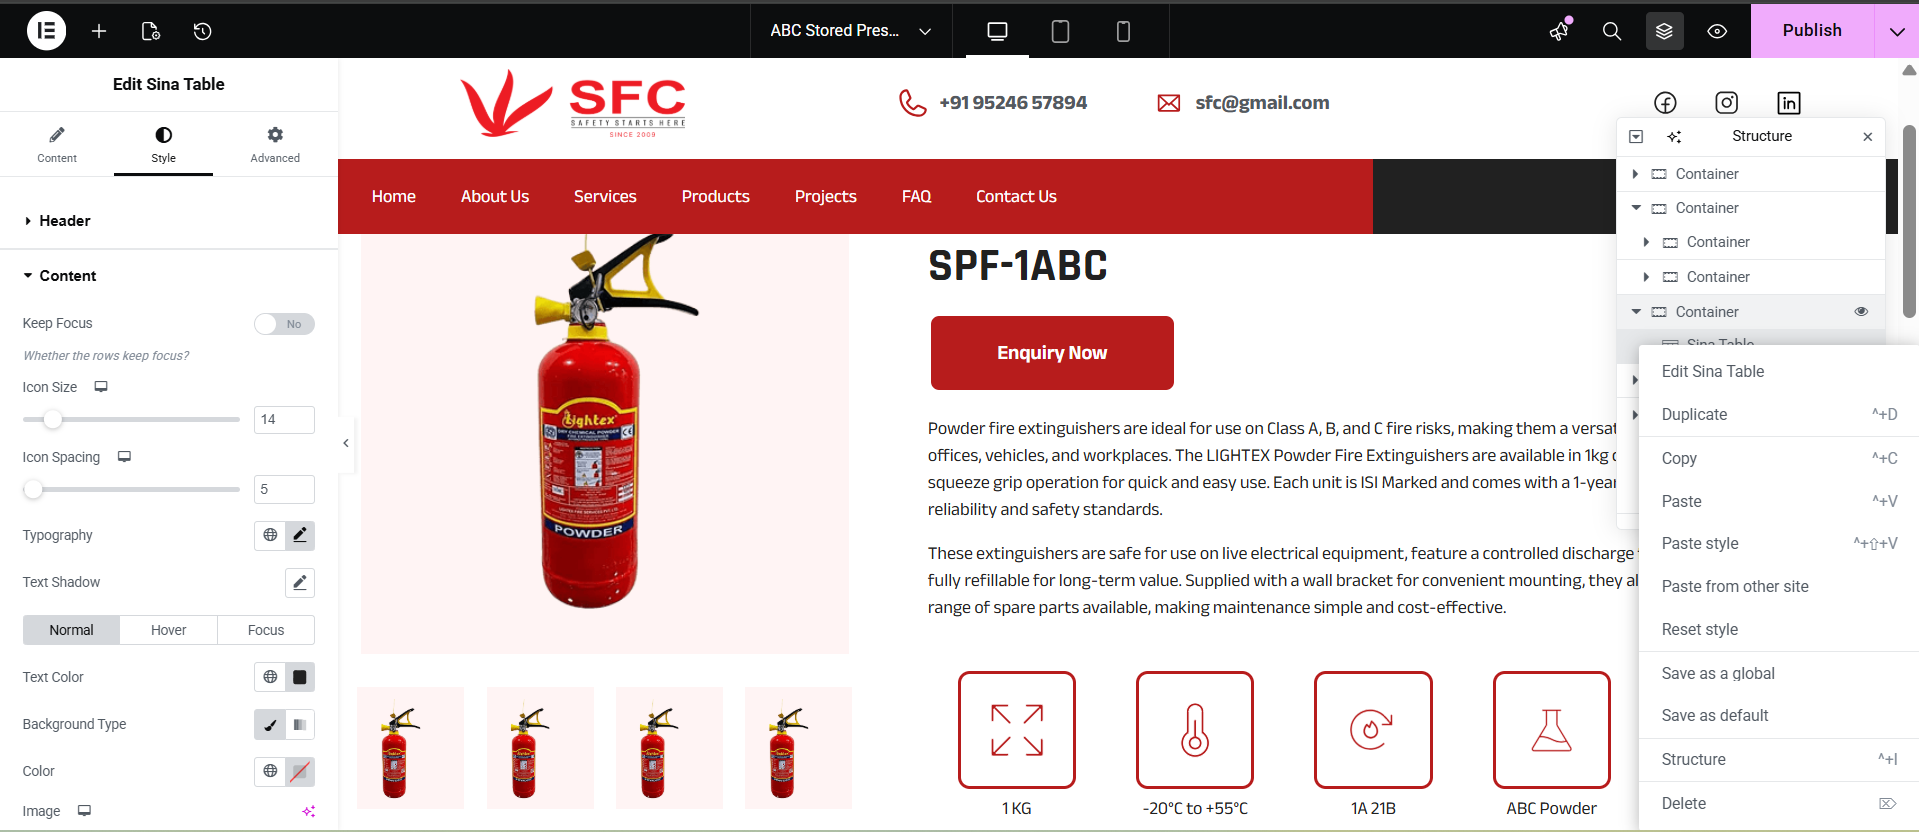
- In the WordPress dashboard, go to Pages → All Pages.
- Find the page labeled Ex : “Home” (or whichever page is set as the homepage).
- If you don’t see “Home,” check Settings → Reading to see which page is set as the “Homepage.”
- Click Edit with Elementor on that page.
2. Editing Content in Elementor
a) Selecting a Section / Widget
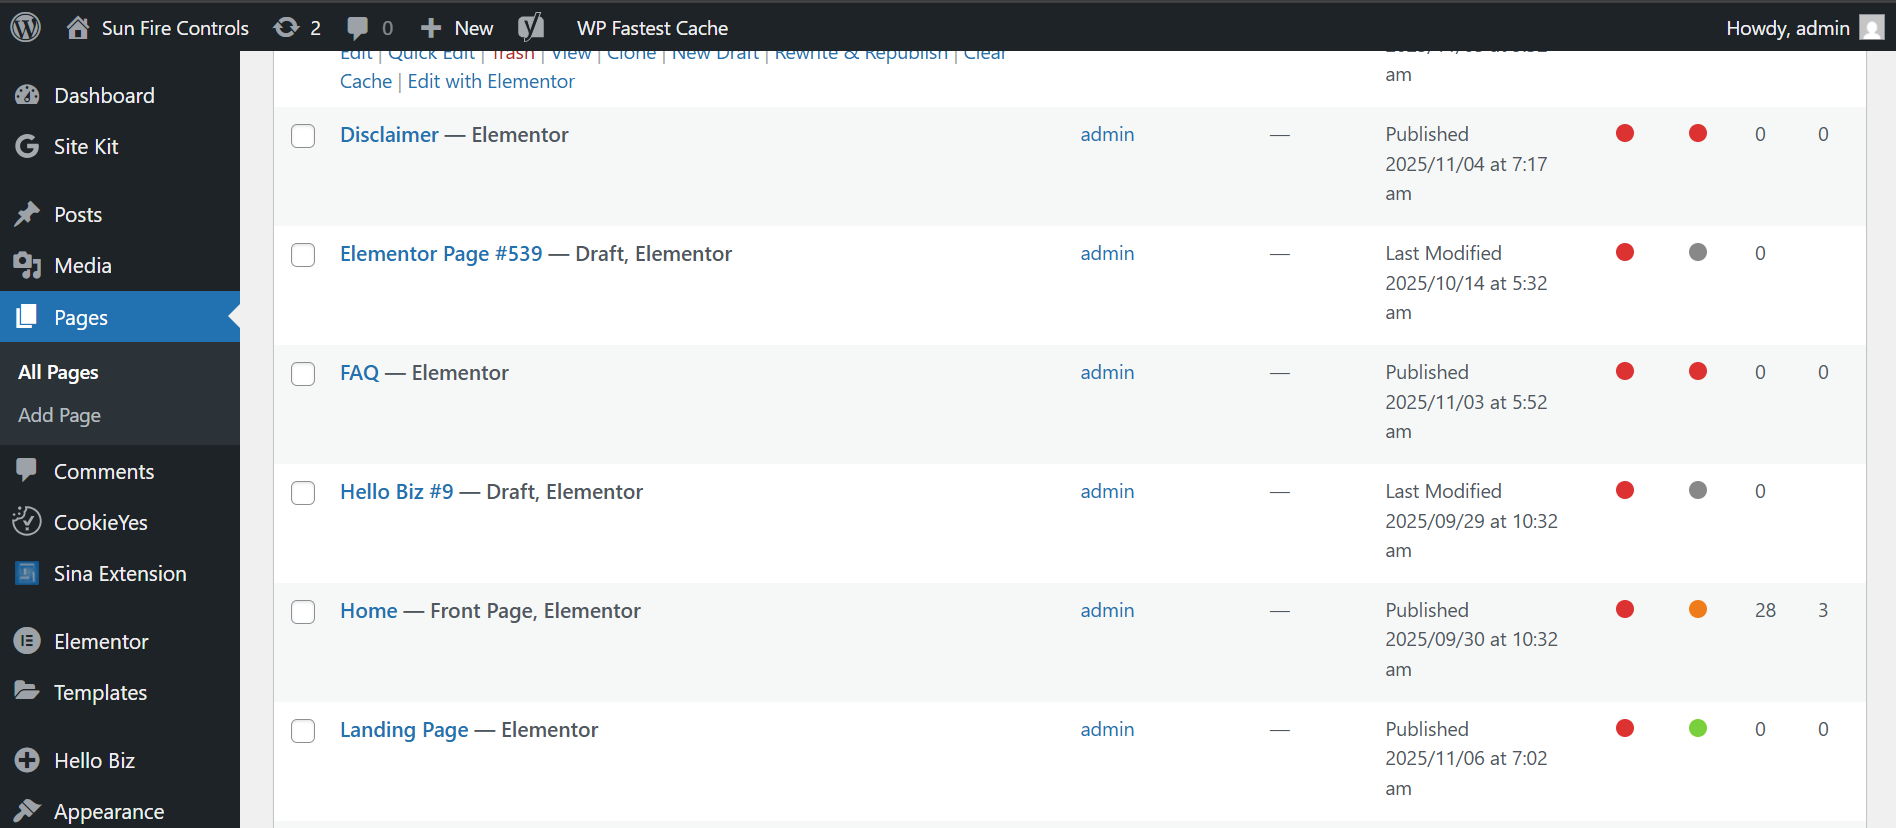
- Hover over a section; you’ll see Pink border and icons for Edit Section, Duplicate, Delete, etc.
- Click the Edit Section (6 dots icon) to modify the section’s layout, style, padding, etc.
- Inside the section, hover a widget (like a heading, text editor, image) and click the Edit Widget icon (pencil icon).
b) Editing Text Content
- After clicking Edit Widget on a Text or Heading widget, on the left panel you’ll see the “Content” tab where you can change the text (title, paragraph, list, etc.).
- Use the “Style” tab to change typography, color, spacing.
- If needed, use the “Advanced” tab for margins, padding, motion effects.
c) Editing / Replacing Images
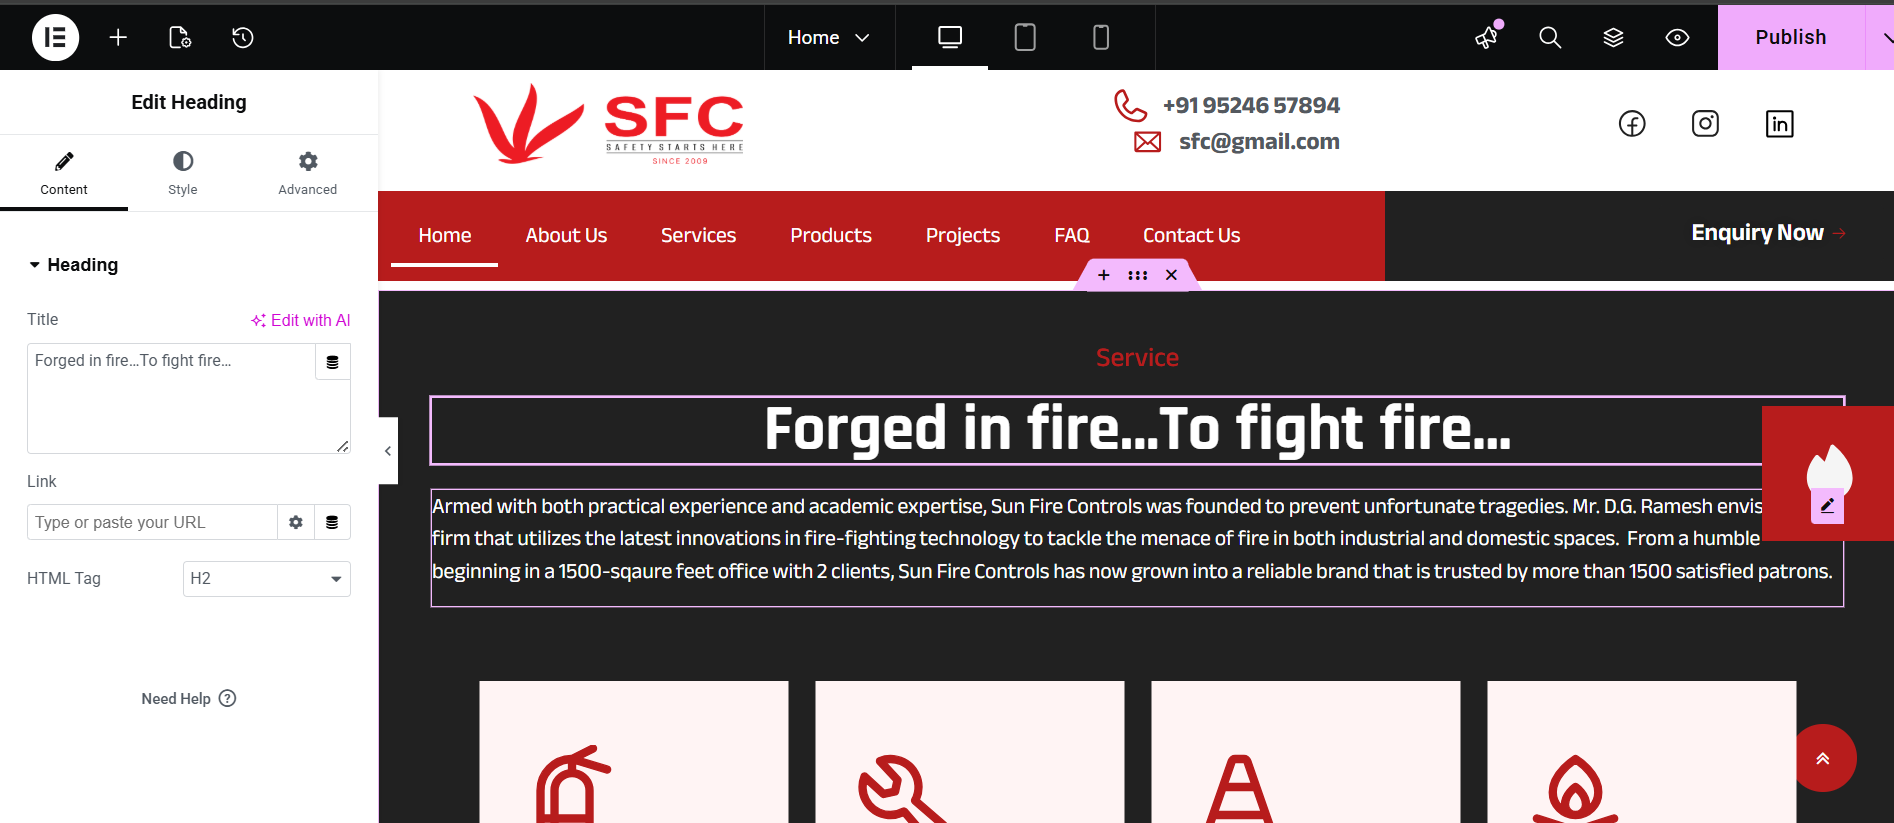
- Click the Image widget (or the widget that holds an image) and in the left panel under “Content → Choose Image” you can pick a different image from Media Library or upload a new one.
- You can also change the image size, alignment, caption, link, etc.
- Under “Style,” you can add borders, shadows, hover effects, etc.
d) Editing / Replacing Button Content
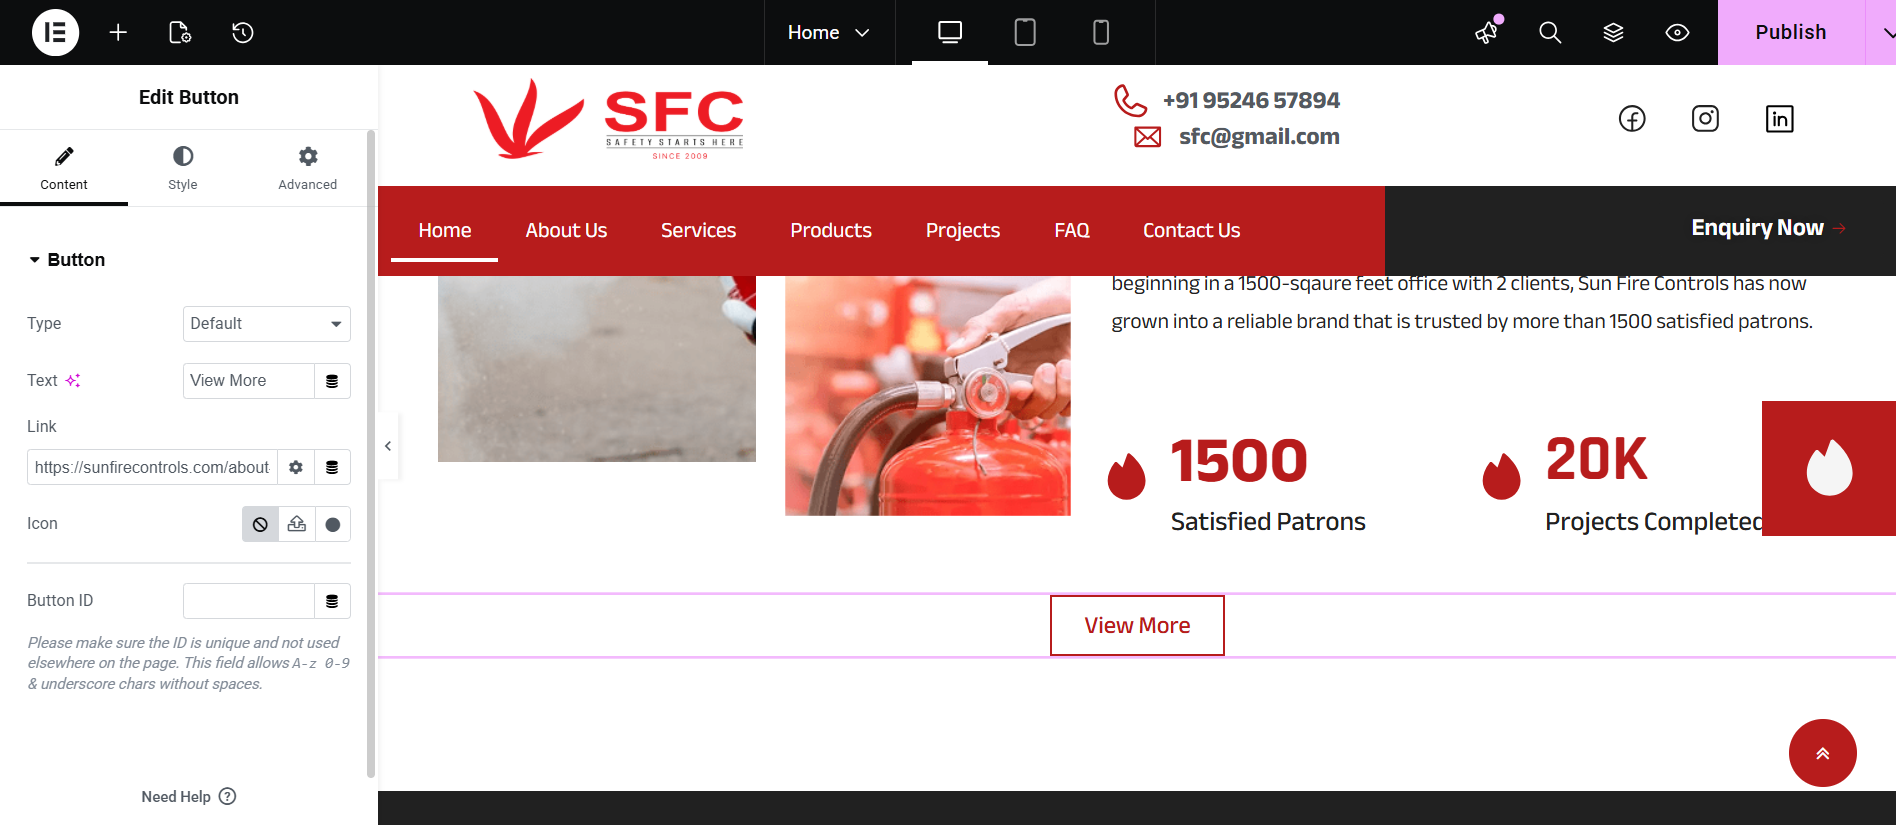
- Select the Button Widget
Click the button you want to edit. The left panel will display the Button widget settings. - Edit Button Text
Under the Content → Text field, you can change the label of the button (e.g., “Let’s Begin” → “Get Started”). - Edit Link / URL
In the Link field, enter the URL where you want the button to navigate. This can be an internal page, external site, or a custom anchor. - Style the Button
- Switch to the Style tab to change:
- Text color
- Background color
- Typography (font, size, weight)
- Borders, border-radius, or shadows
- Hover effects
- Switch to the Style tab to change:
- Advanced Settings
In the Advanced tab, you can adjust:
- Margin and padding
- Motion effects
- Responsive visibility (show/hide on desktop, tablet, mobile)
Save Changes
Once edits are done, click Update at the bottom of the Elementor panel to save your
changes.
3. Adding New Content / Elements
To insert new widgets or sections:
On the left panel (Elementor toolbox), search for the widget you want (Heading, Image, Button, etc.).
Drag & drop it into your desired section or into a new section.
Configure its content, style, and advanced settings as above.
To add a new section: click the “+” icon (Add New Section), choose structure (e.g. one column, two columns etc.), then drag widgets into it.
4. Deleting Sections / Widgets / Images
To delete a widget: hover over it → right-click → Delete (or click the “X” icon).
To delete a section: hover the section → right-click the 6-dot handle → Delete.
If deleting an image from the media library (sitewide): go to Media → Library, find the image, click it and choose Delete Permanently. (Be cautious — if it’s used elsewhere you’ll break that usage.)
5. Publishing / Saving Changes
- After you make edits, click Publish (Top Right) in Elementor to save changes.
- View the page (Preview Changes) to ensure it looks correct on desktop, tablet, mobile.

Documentation Steps to Edit This:
| Step | Action | Notes / Tips |
|---|---|---|
| 1 | In Elementor, locate the top section (hero) | Use the navigator (bottom left icon) to find “Section – Hero” easily |
| 2 | Change background image or color | Click Edit Section → Style → Background → Choose Image / Overlay |
| 3 | Edit heading text | Click the heading widget → change text under “Content” tab |
| 4 | Edit paragraph / description | Click the text / editor widget → update content |
| 5 | Edit button (label / link) | Click button widget → Under “Content” change text, set URL (link) |
| 6 | Add / remove widget in this section (e.g. add icon or link) | Drag a widget (icon, text, etc.) into this section, adjust layout |
| 7 | Delete a widget if not needed | Right-click → Delete |
| 8 | Adjust spacing / padding to make layout neat | Use “Advanced” tab → padding / margin settings |
| 9 | Preview across devices | Use the responsive mode toggles (desktop / tablet / mobile) |
| 10 | Click Update to save | Always save after changes |
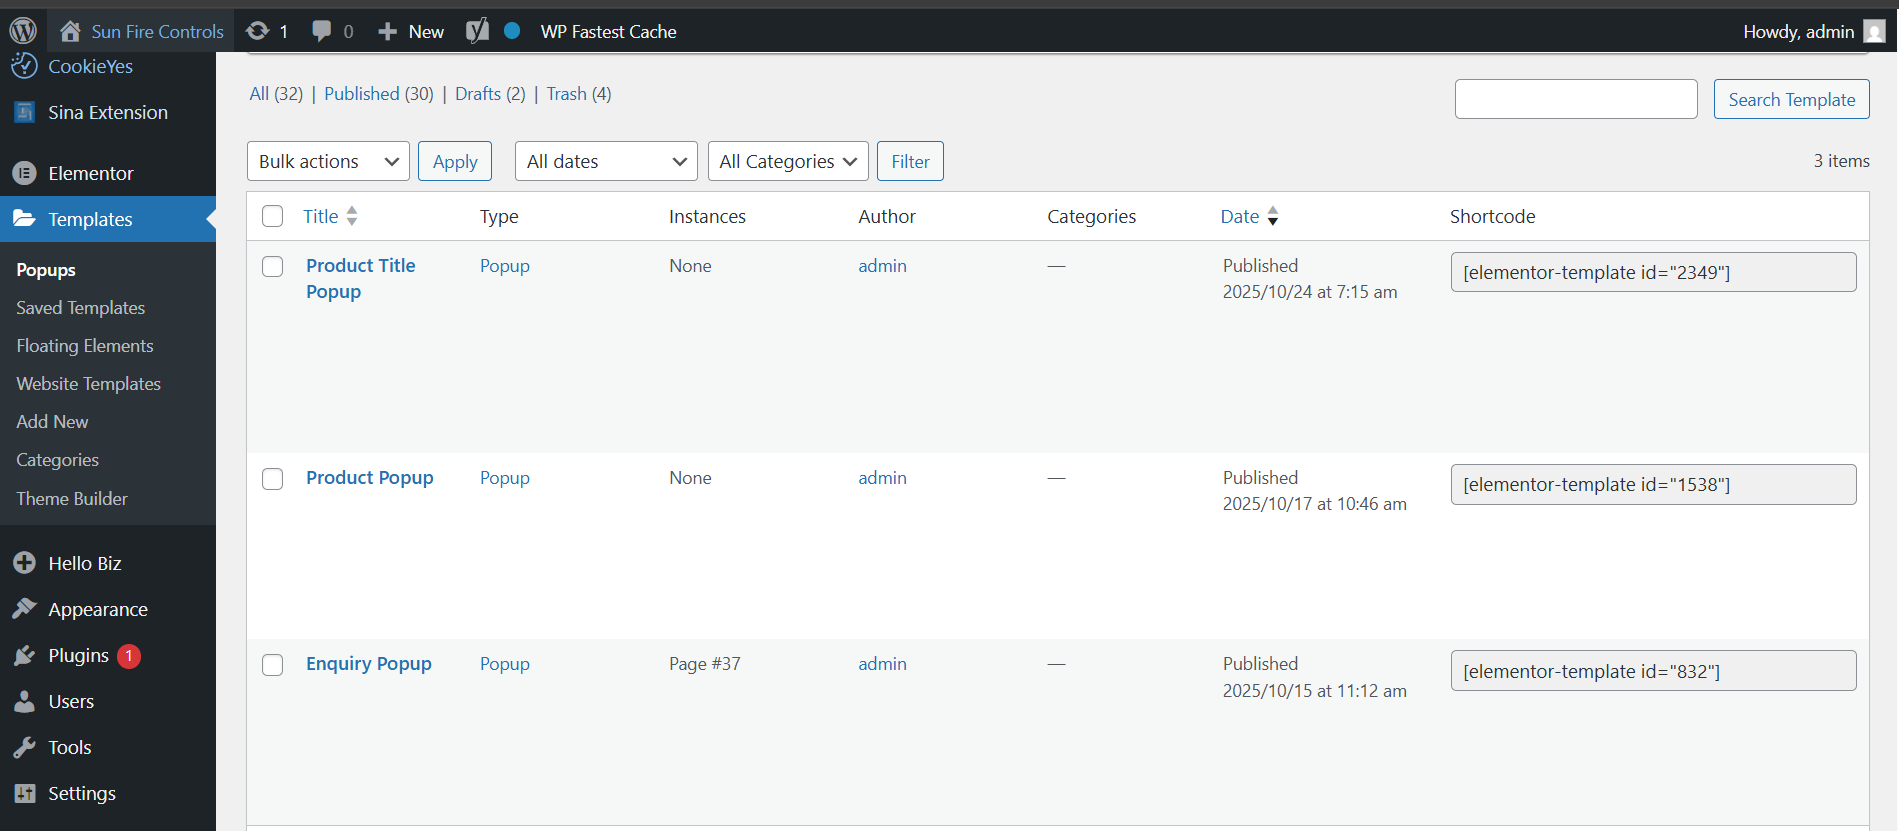
1. Accessing Popups in Template Menu
To create or edit popups through Elementor:
Go to WordPress Dashboard
Navigate to Templates → Popups
You will see a list of existing popups created in Elementor
From here, you can:
Edit existing popups
Create new popup
Manage triggers and display conditions
2. Editing an Existing Popup
If you need to modify the design or content of a popup:
Go to Templates → Popups
Hover over the popup you want to edit
Click Edit with Elementor
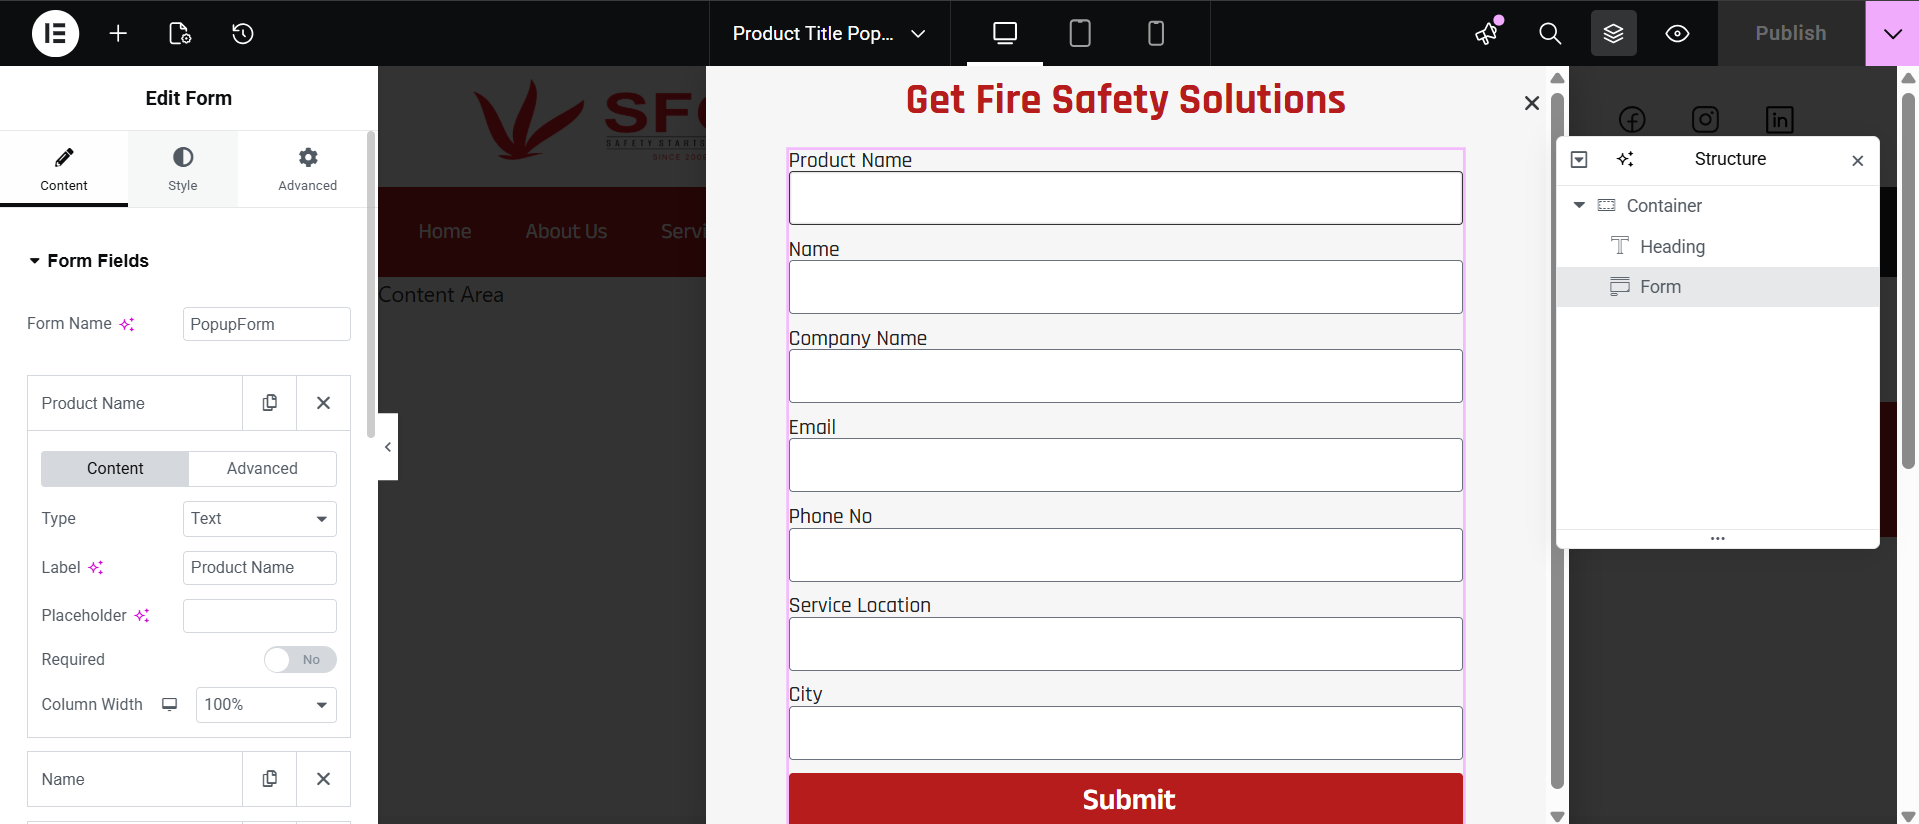
Inside Elementor you can:
Update text, images, input forms, and buttons
Change popup layout and animations
Adjust overlay, entrance effects & closing behavior
After editing, click:
Update to save changes.
3. Creating a New Popup
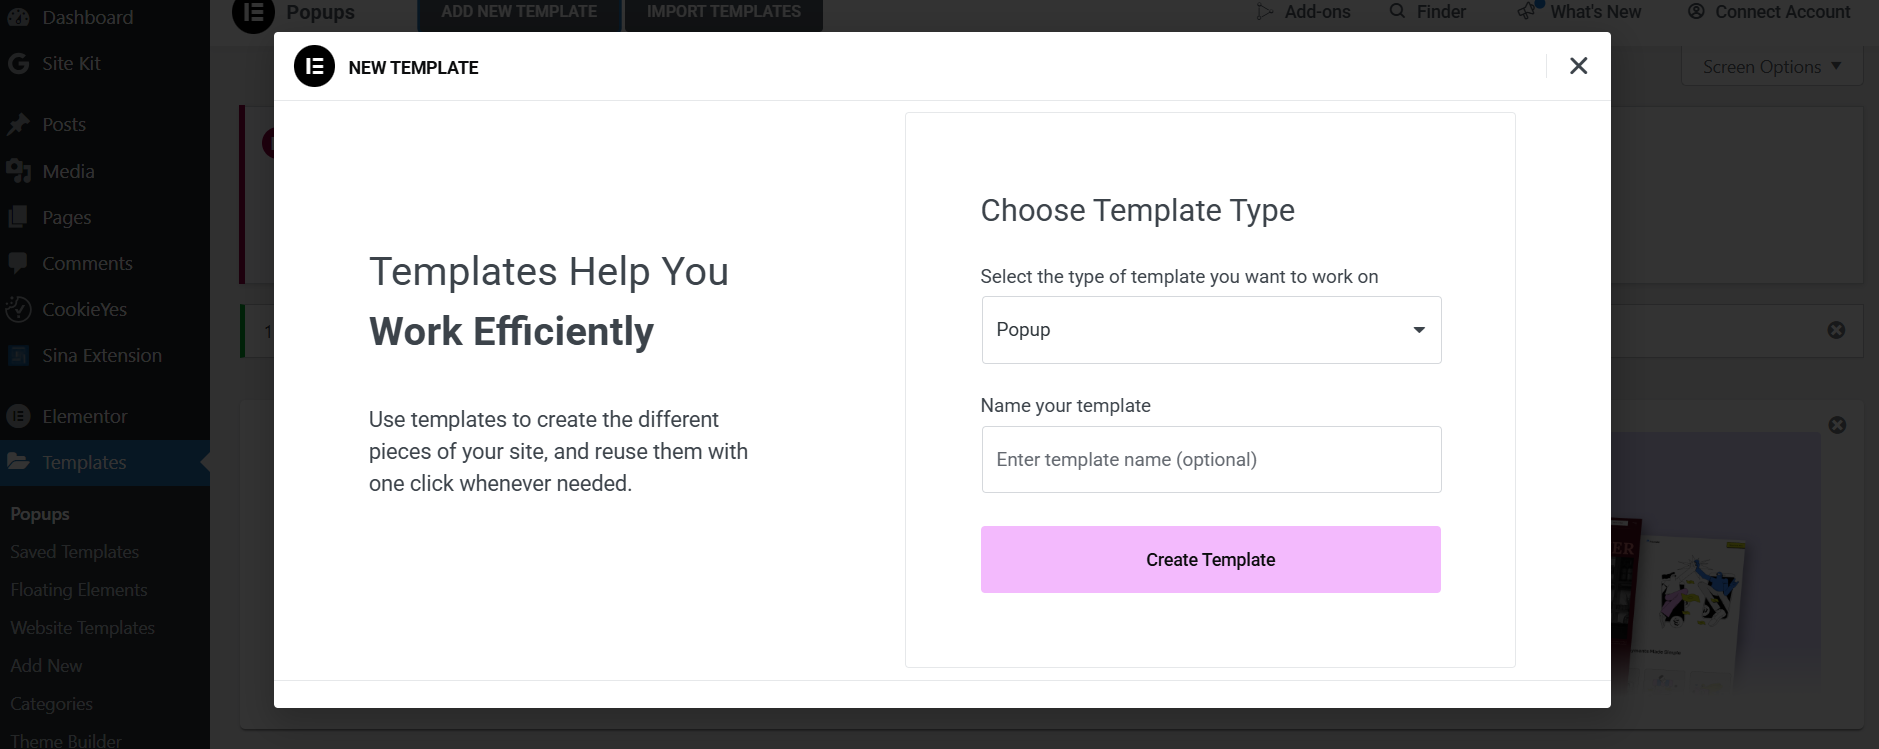
Go to Templates → Popups
Click Add New Popup
Choose a layout or start with a blank template
Design the popup like a normal Elementor page
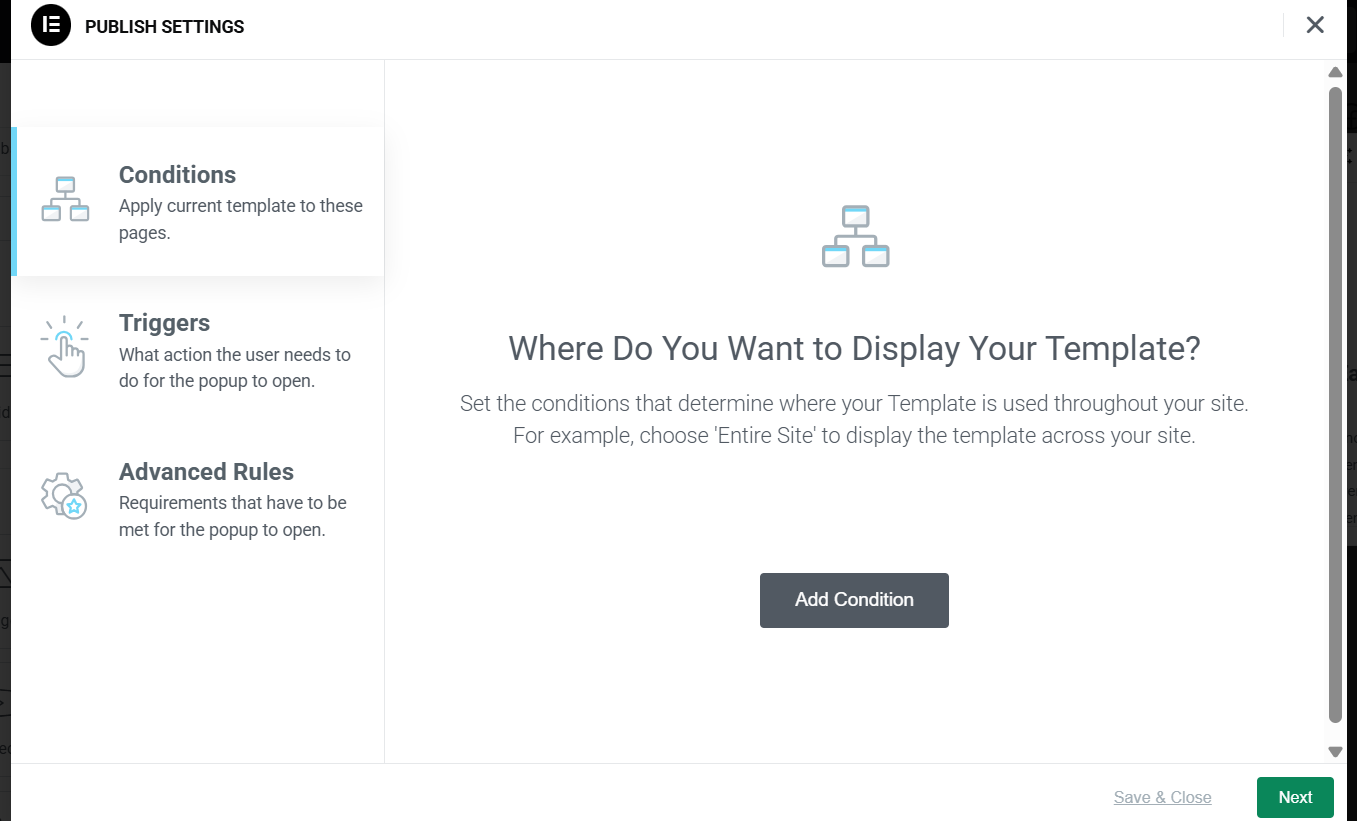
After designing, configure behavior:
Click the Publish button
Add Conditions – where it appears (entire site, selected page, blog only, etc.)
Add Triggers – like On page load / scroll / exit intent / click
Add Advanced Rules (optional)
4. Temporarily Disabling a Popup
To disable a popup without deleting it:
Go to Templates → Popups
Hover over your popup
Click Edit Conditions
Remove all display conditions
Click Save & Close
This turns the popup OFF but keeps the design intact.
5. Permanently Deleting a Popup
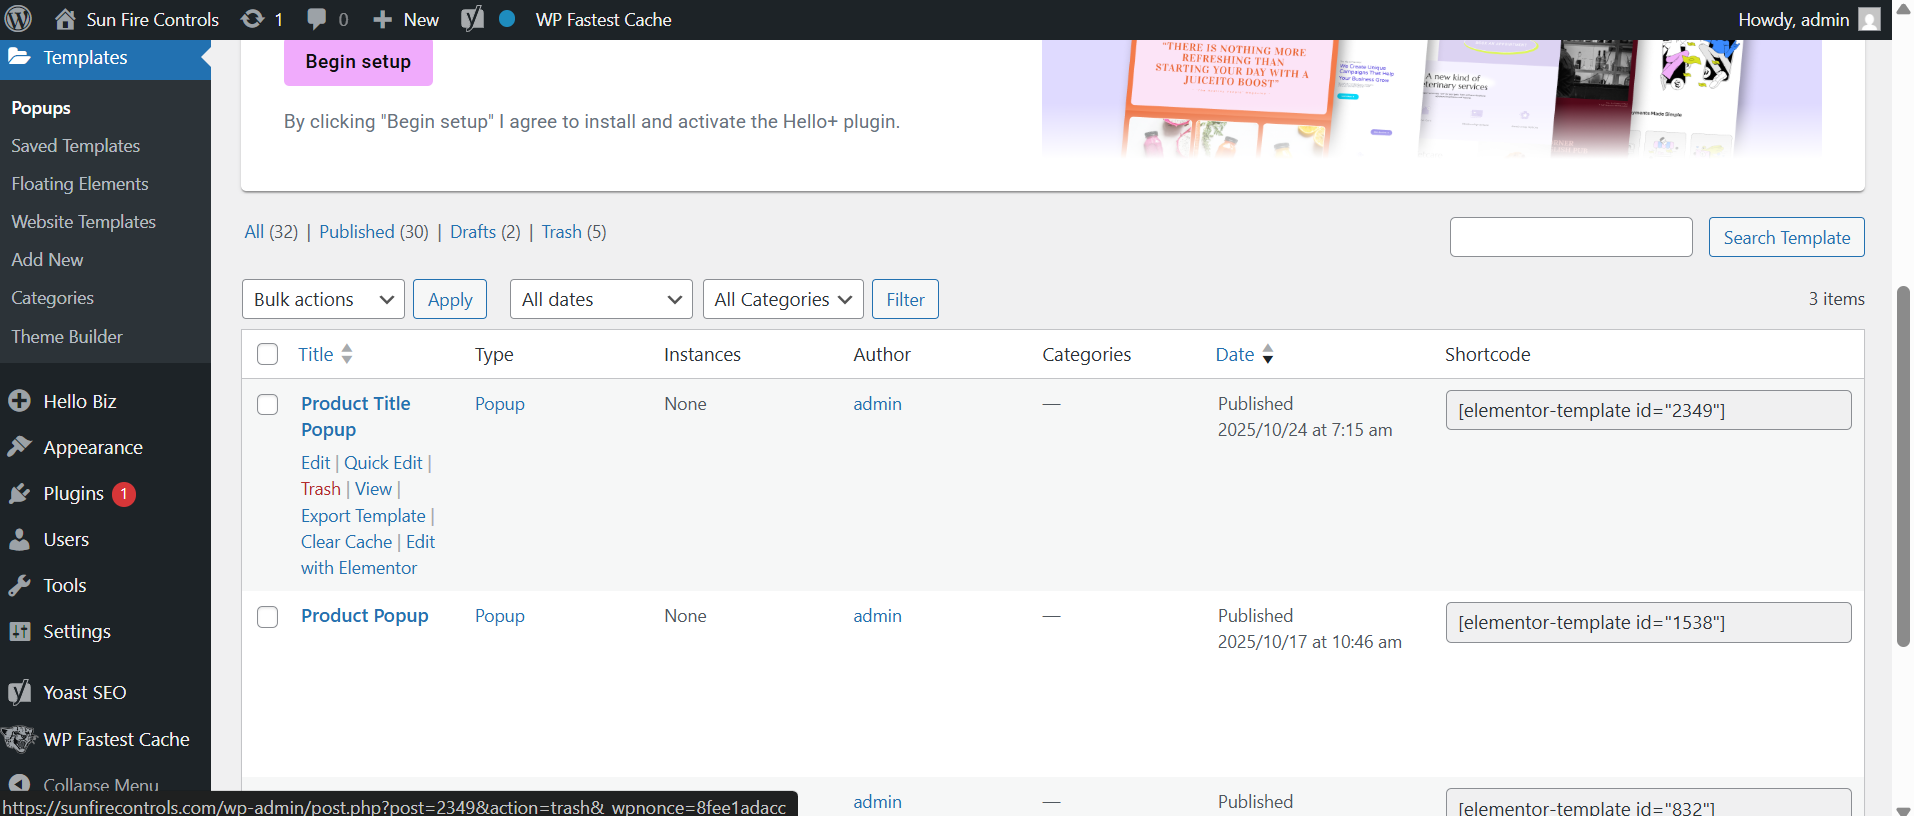
To completely remove a popup:
Go to Templates → Popups
Hover the popup name
Click Trash
1. Accessing Slider Widgets
To use Slider or Sina Content Slider in Elementor:
Open the WordPress Dashboard
Go to Pages or Templates → choose the page to edit
Click Edit with Elementor
In the widget panel, search for:
Slider
Sina Content Slider
Drag and drop the widget into your section
2. Creating a Slider
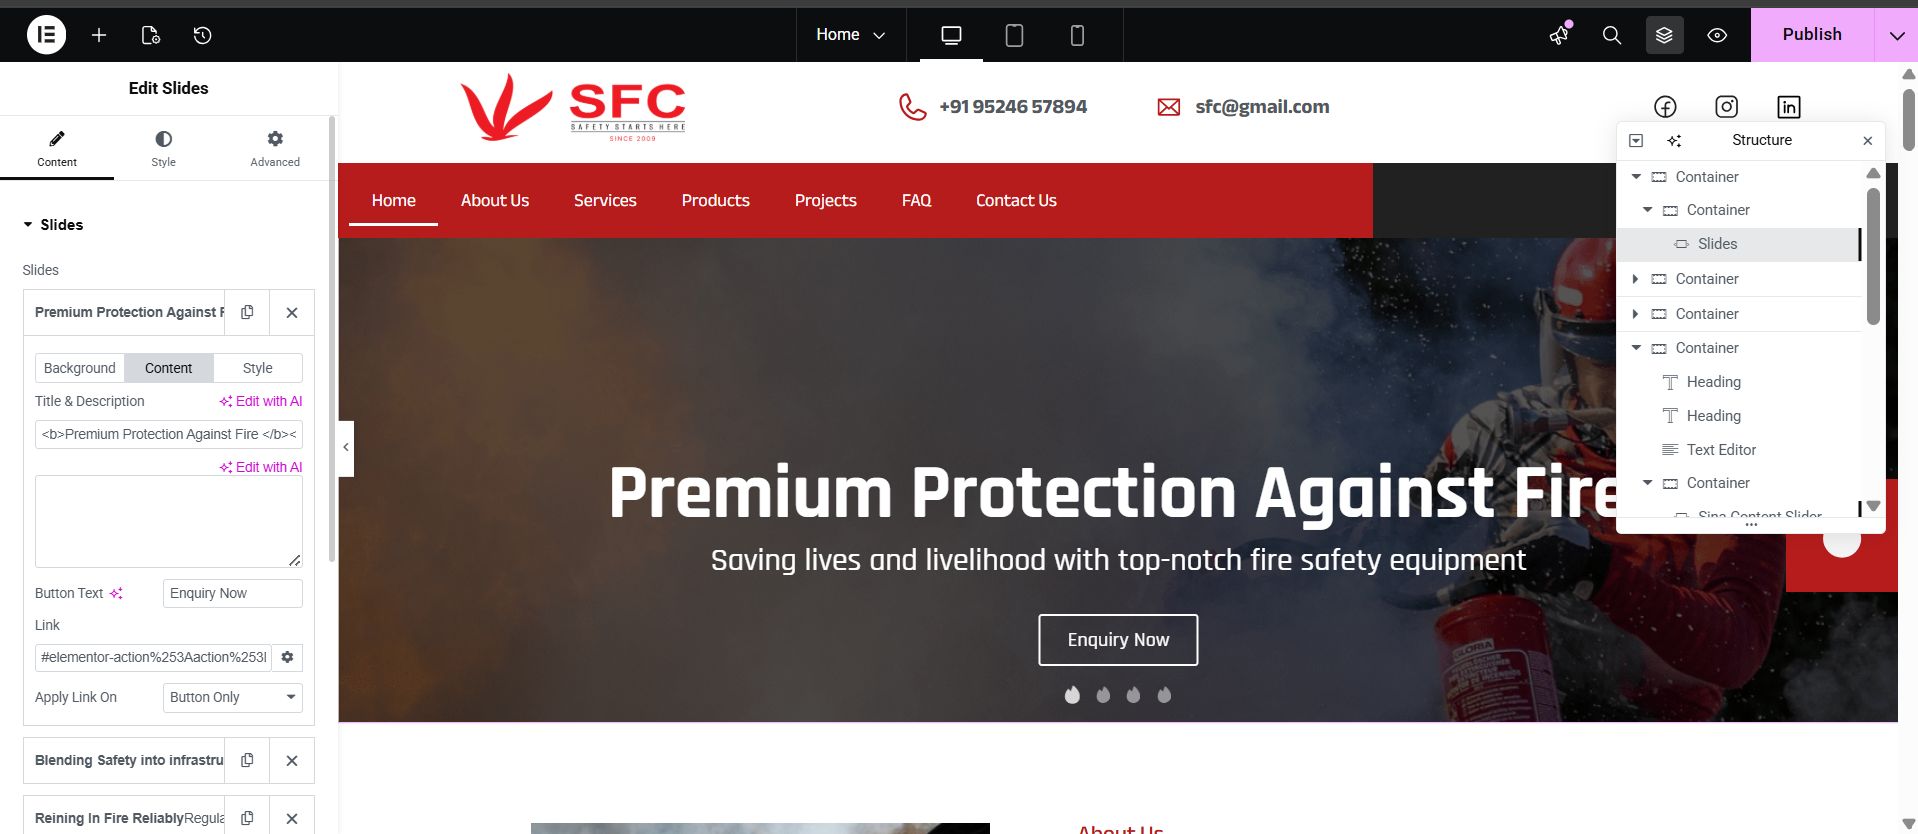
The Slider widget allows multiple slides with images, buttons & animations.
Steps to Create a Slider
Drag Slider widget to the page
Go to Content → Slides
Click Add Item to create slides
For each slide, you can modify:
Title
Subtitle / Description
Background image
Button text & link
Alignment & layout
Move to Style Tab and customize:
Typography & spacing
Background overlay
Button style
Navigation arrows & dots
Go to Advanced Tab to set:
Motion effects
Custom padding/margins
Responsive visibility
Click Update to save changes
3. Creating a Sina Content Slider
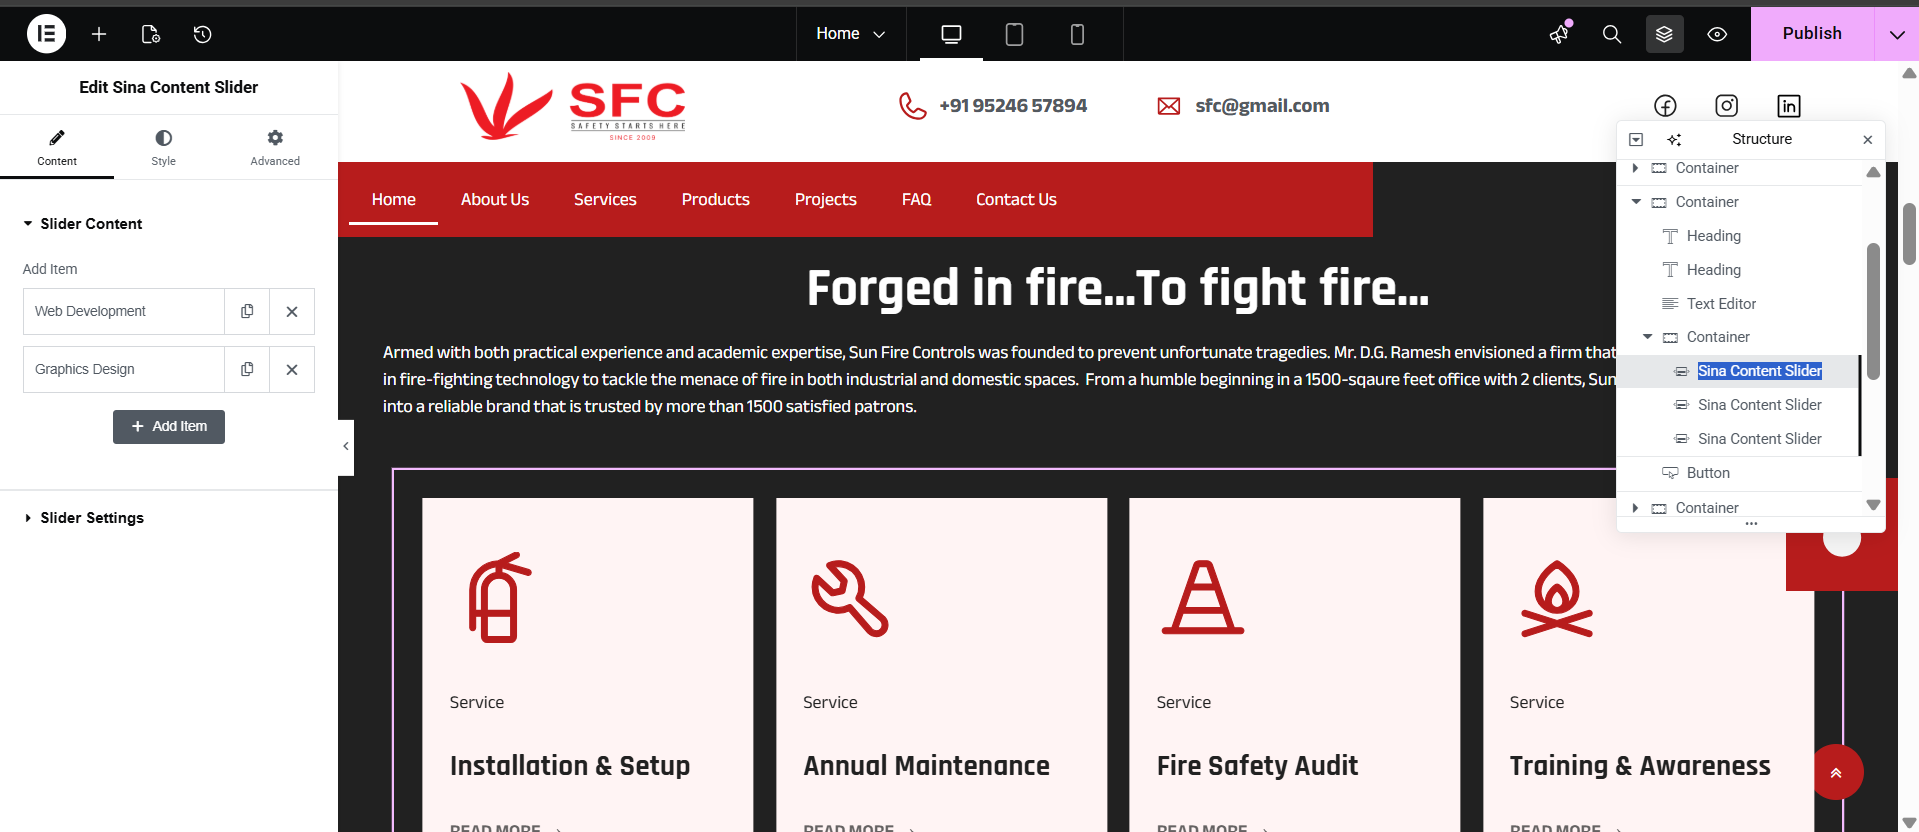
The Content Slider is for text blocks, multiple content cards, service boxes, testimonials, etc.
Steps to Build Content Slider
Drag Sina Content Slider into your layout
Under Slides, click Add Item
Add content items:
Icon / image
Title
Description
Links or buttons
Use the Layout Options to customize:
Number of visible items per row
Column spacing
Loop / Autoplay
Slide direction
Slide duration & speed
Style tab allows:
Box background & borders
Icon & heading color
Hover effects
Click Update to publish
4. Responsive Settings
Both sliders support responsive control.
To style for mobile / tablet:
Go to Advanced → Responsive
Hide or show slides per device
Change Slides per view (1 slide on mobile is recommended)
Adjust spacing & font sizes
5. Autoplay & Navigation Settings
To control playback:
Go to Content → Settings
Options include:
Autoplay On / Off
Autoplay speed
Pause on hover
Loop
Navigation arrows
Pagination dots
1. Accessing the Testimonial Slider Code
To edit or manage the custom testimonial slider:
Go to WordPress Dashboard
Navigate to Pages
Open the page where the testimonial slider is used
Click Edit with Elementor
Locate the section containing Custom HTML
Open HTML Widget to view the complete slider code
(HTML + CSS + JS included inside)
2. Updating Testimonial Content
Inside the <section class="testimonial-section"> you will find multiple <div class="swiper-slide"> blocks.
Each block contains:
Title
Description
Author name
Author company
Client image
How to edit a testimonial
Modify only text and image inside one slide:
To Add a New Slide
Copy existing slide block and paste it before closing tag </div></div></section>
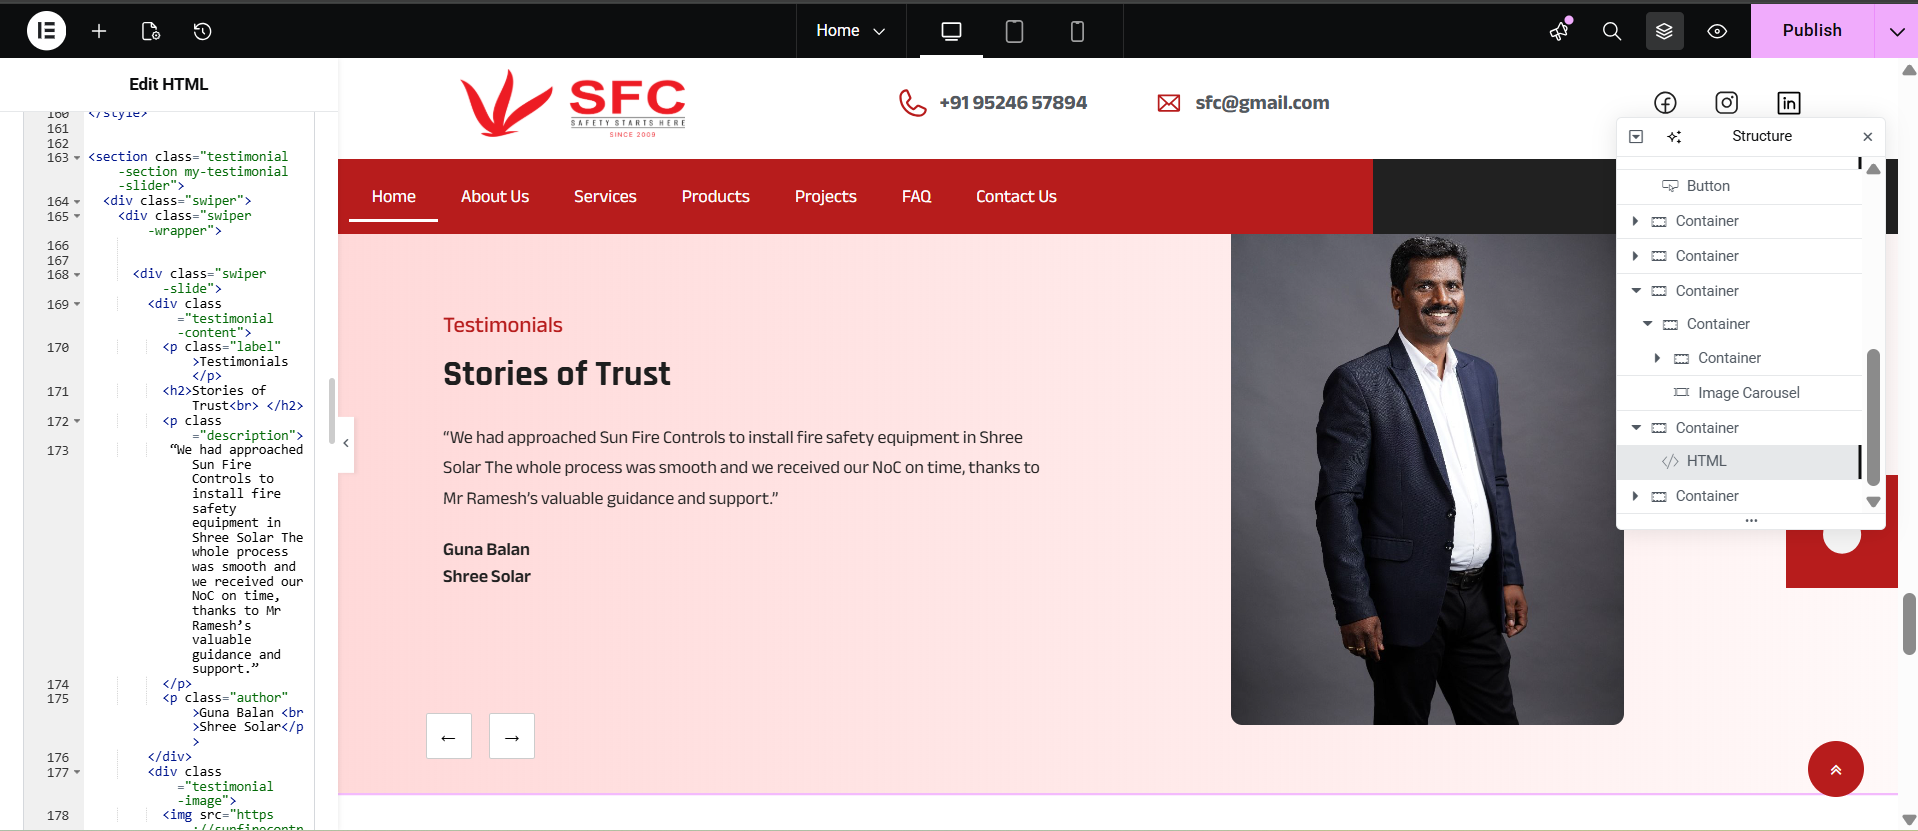
3. Changing Client Images
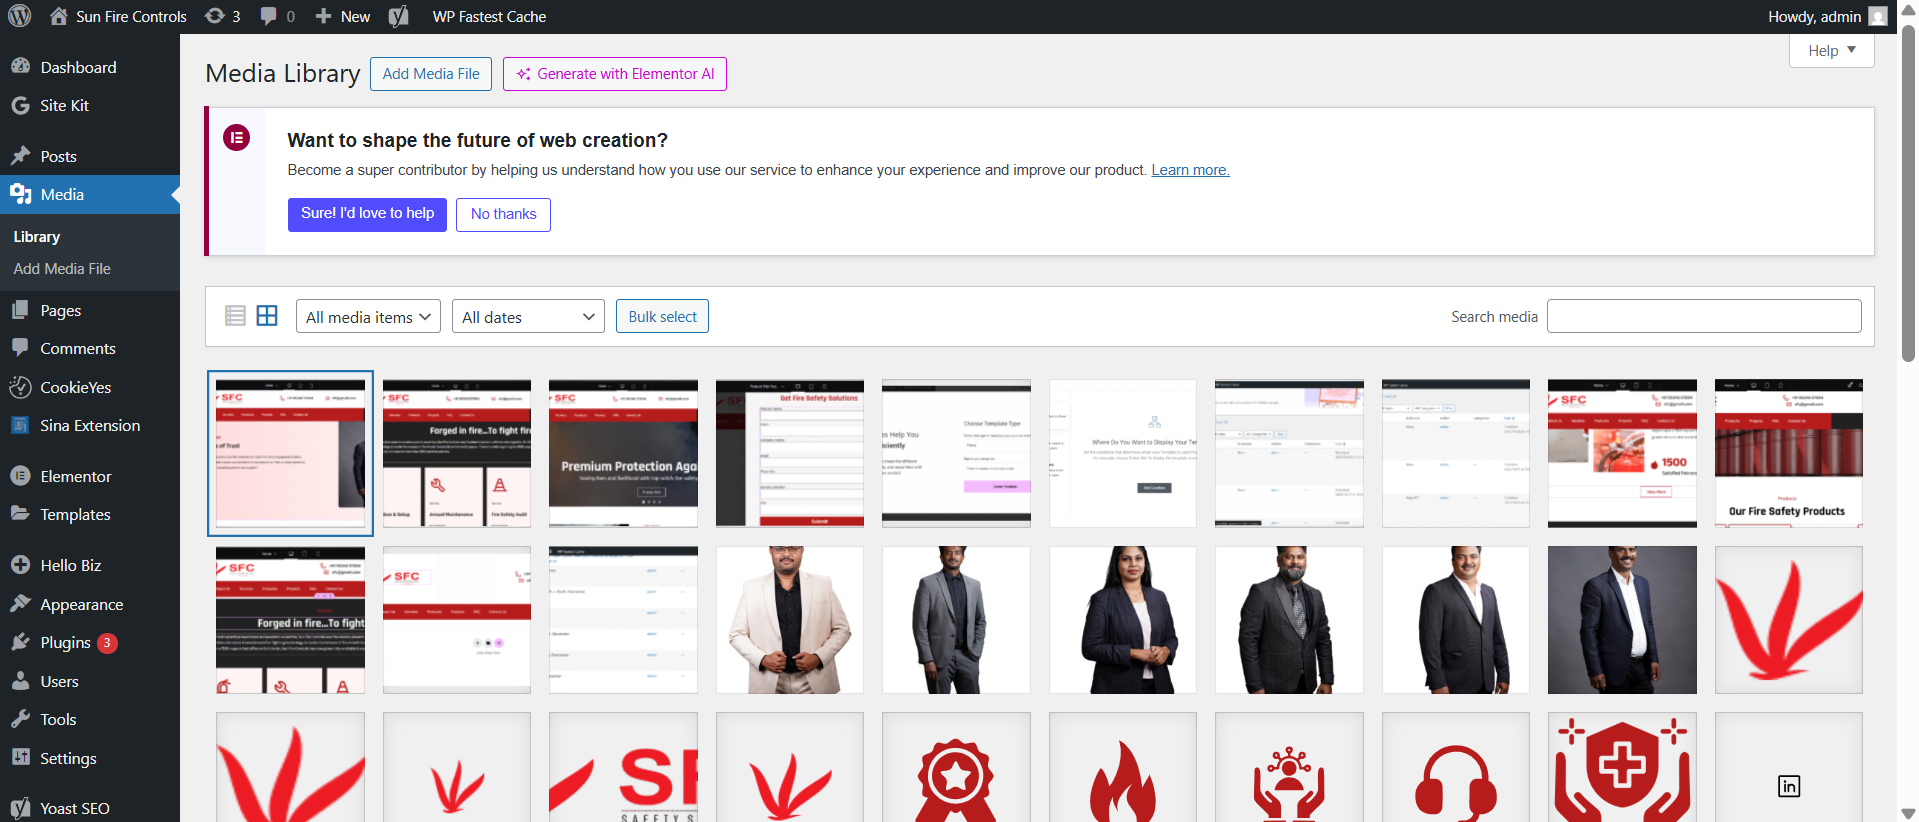
Upload the required images under:
Dashboard → Media → Add New
Copy the file URL and replace it in:
Recommended Image Size: 350×450 px
Recommended File Type: JPG/JPEG (compressed)
1. Adding an Image Carousel
To insert an image carousel:
Go to WordPress Dashboard
Navigate to Pages
Click Edit with Elementor
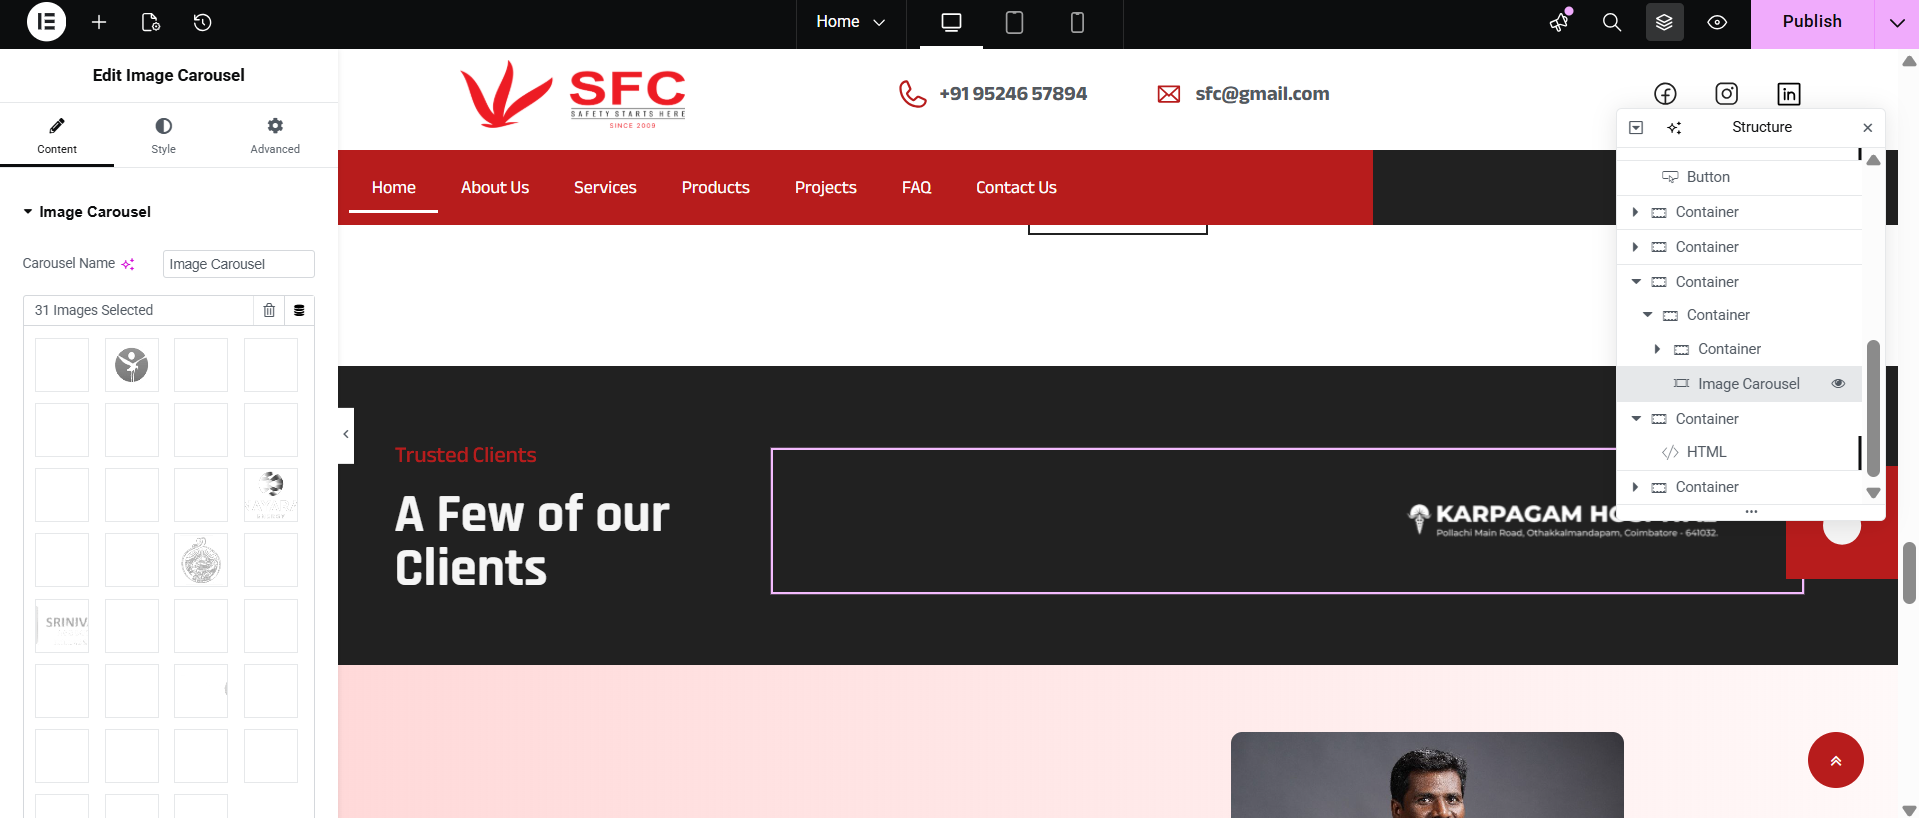
Inside the page structure, choose the section where you want the slider
Search “Image Carousel” in the Elementor widget panel
Drag & drop Image Carousel widget into the section
2. Adding Images
Click the widget to open settings in the left panel
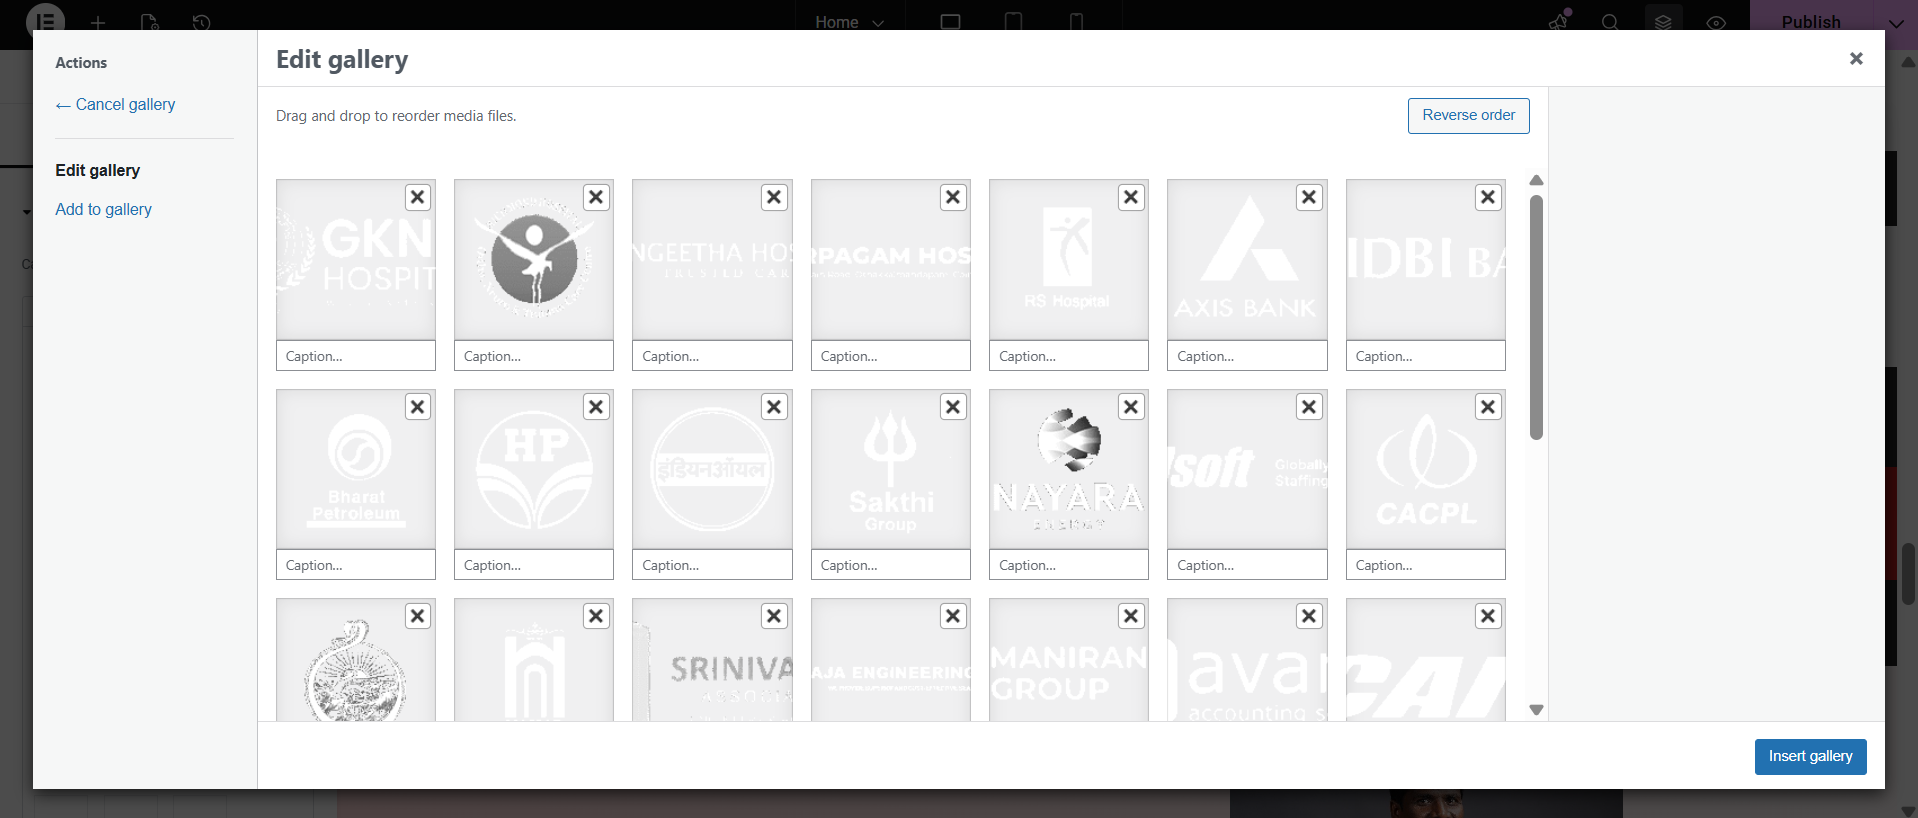
Under Images → Add Images
Upload new images or select from existing media
After adding, click Insert Gallery
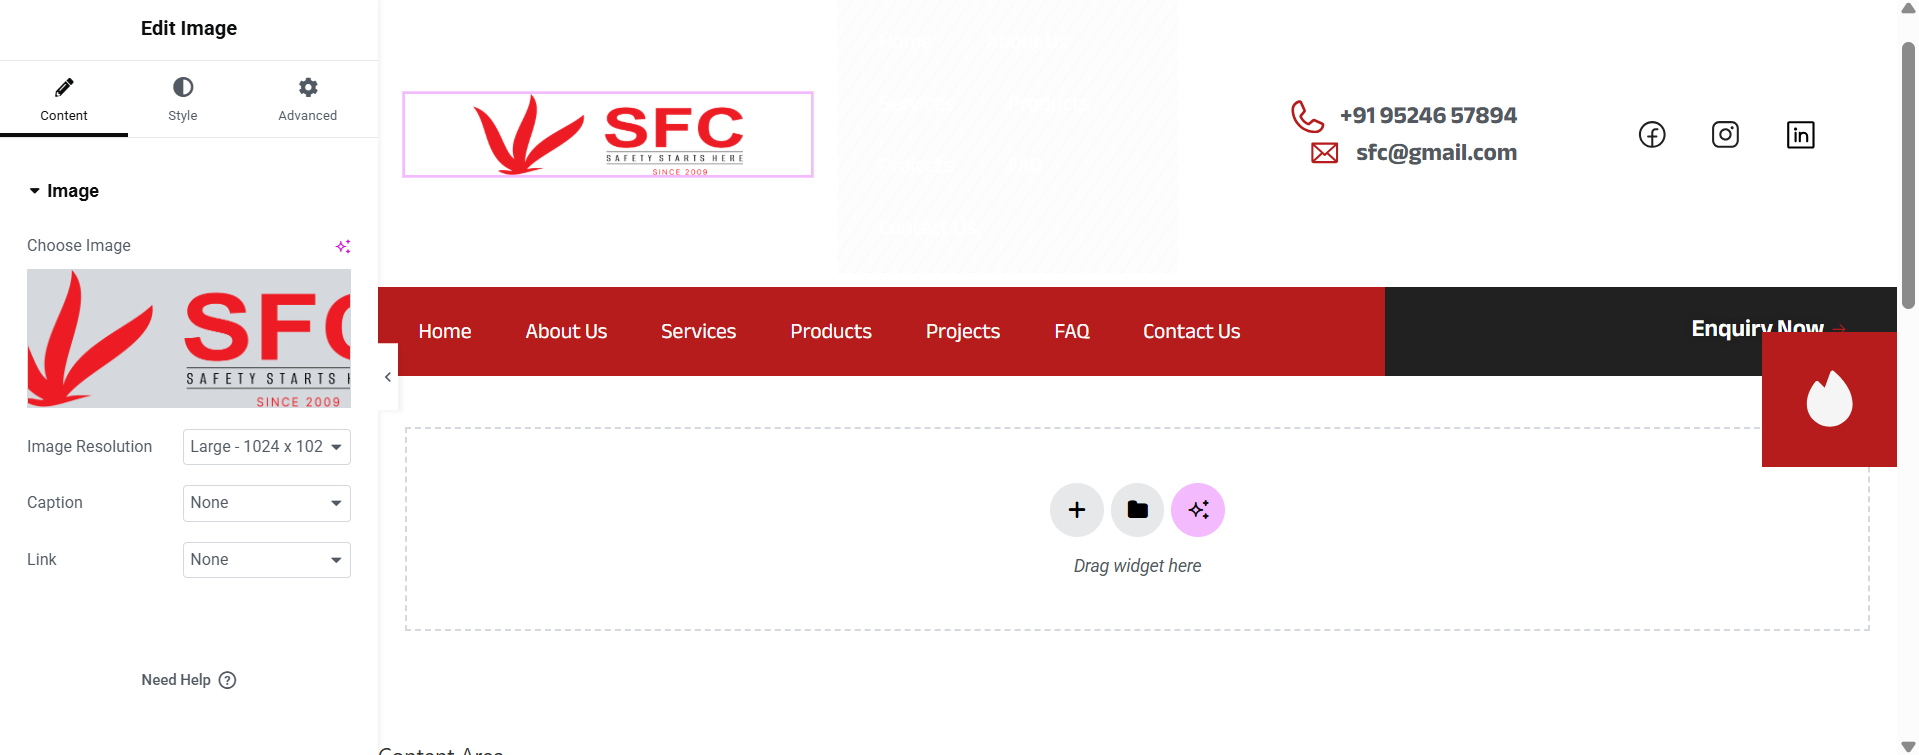
1. Accessing Sina Table in Elementor
Open your WordPress Dashboard.
Navigate to Pages → choose the page you want to edit.
Click Edit with Elementor.
In the Elementor left widgets panel, search for “Sina Table”.
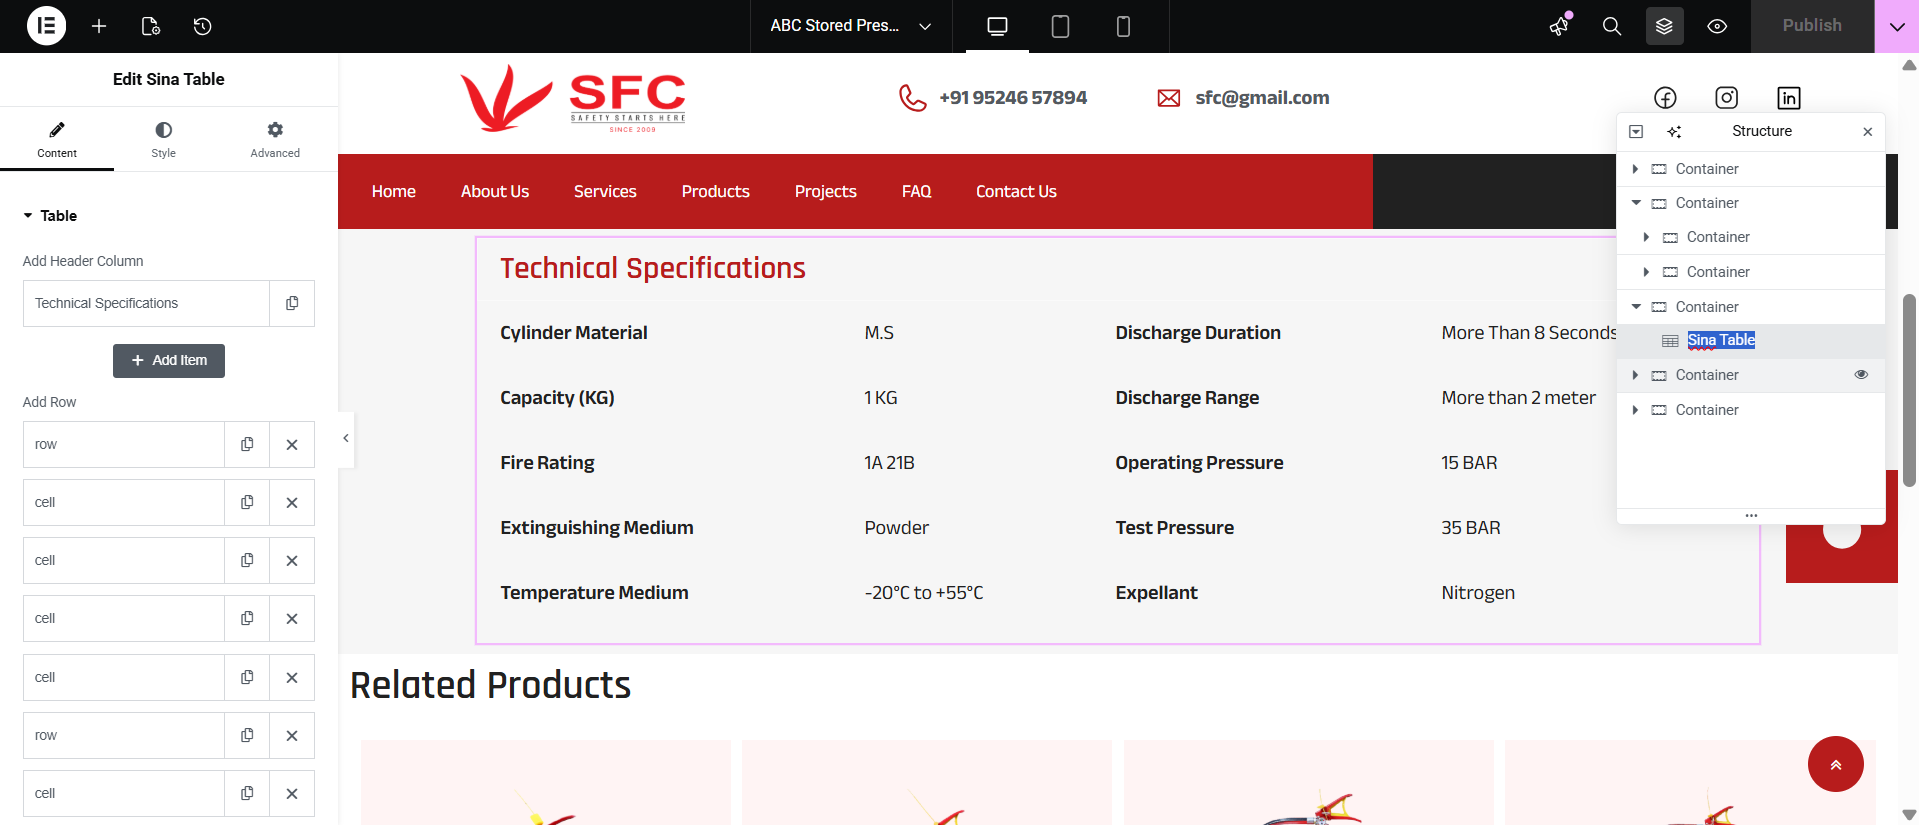
Drag and drop the Sina Table widget into the desired Container/Section, as shown in the image.
2. Adding Table Header
Inside the widget settings panel under Content → Table:
Click Add Header Column
Enter the header text (example: Technical Specifications)
To duplicate or delete a header, use the icons next to it.
3. Adding Rows & Columns
To add table content:
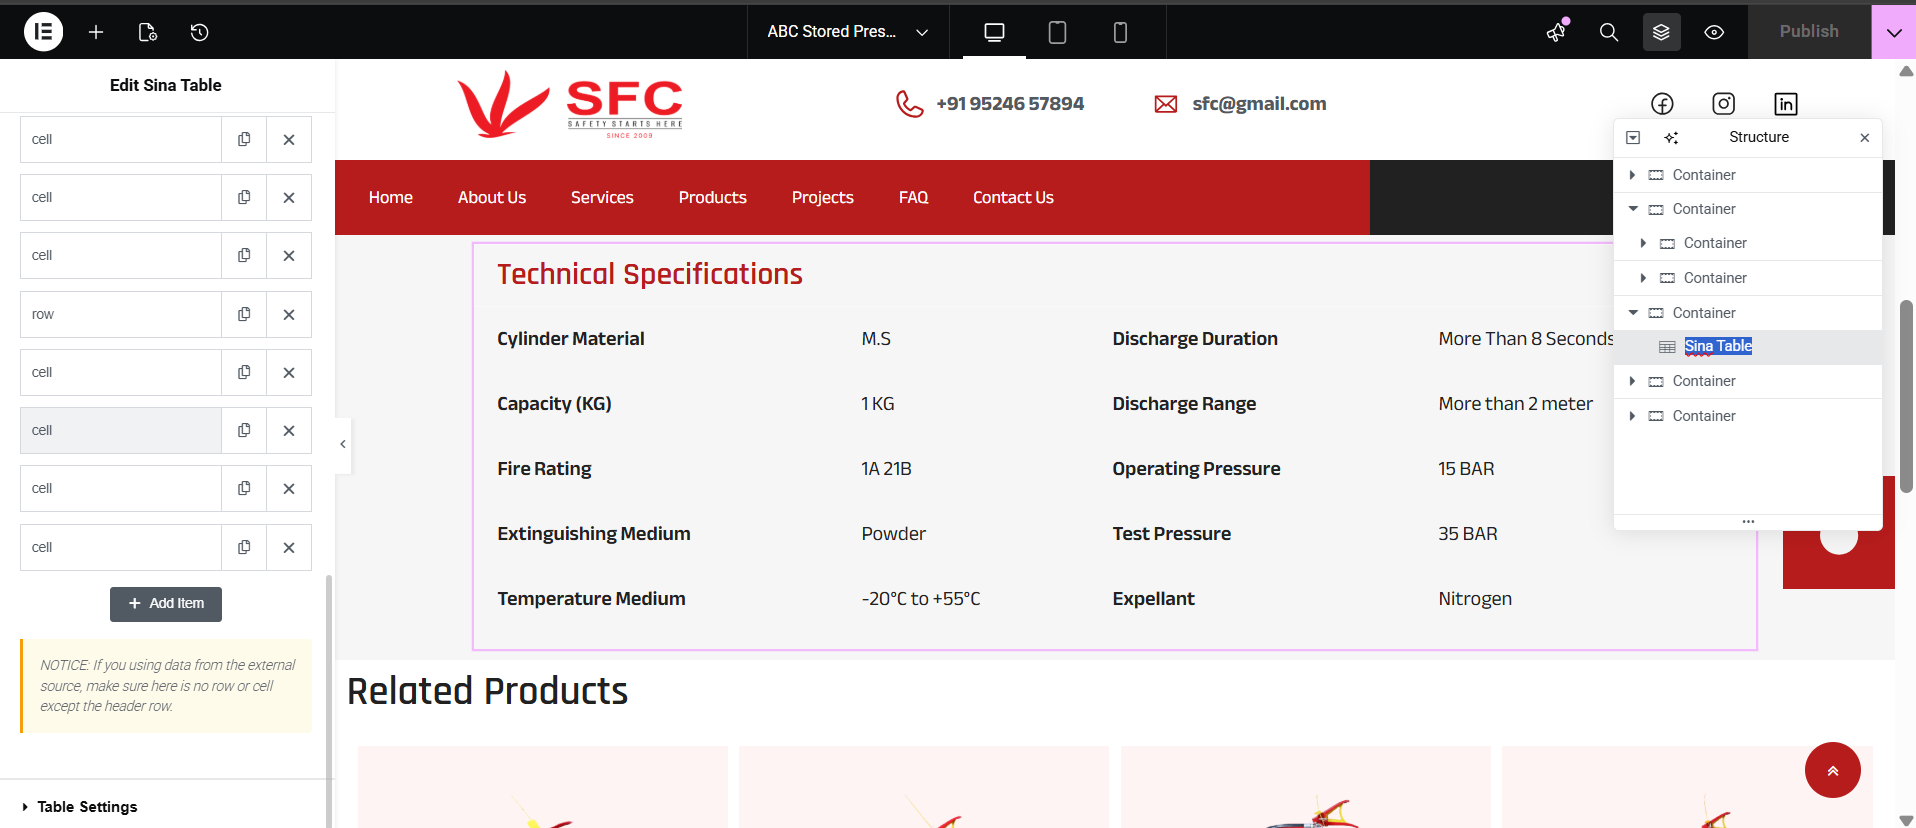
Click Add Row
Inside each row, add multiple cells (example: Specification name & value)
Type your data:
Cylinder Material — M.S
Capacity (KG) — 1 KG
Fire Rating — 1A 21B
Operating Pressure — 15 BAR
Repeat Add Row for additional items.
Reorder rows using the drag icon.
4. Styling the Table
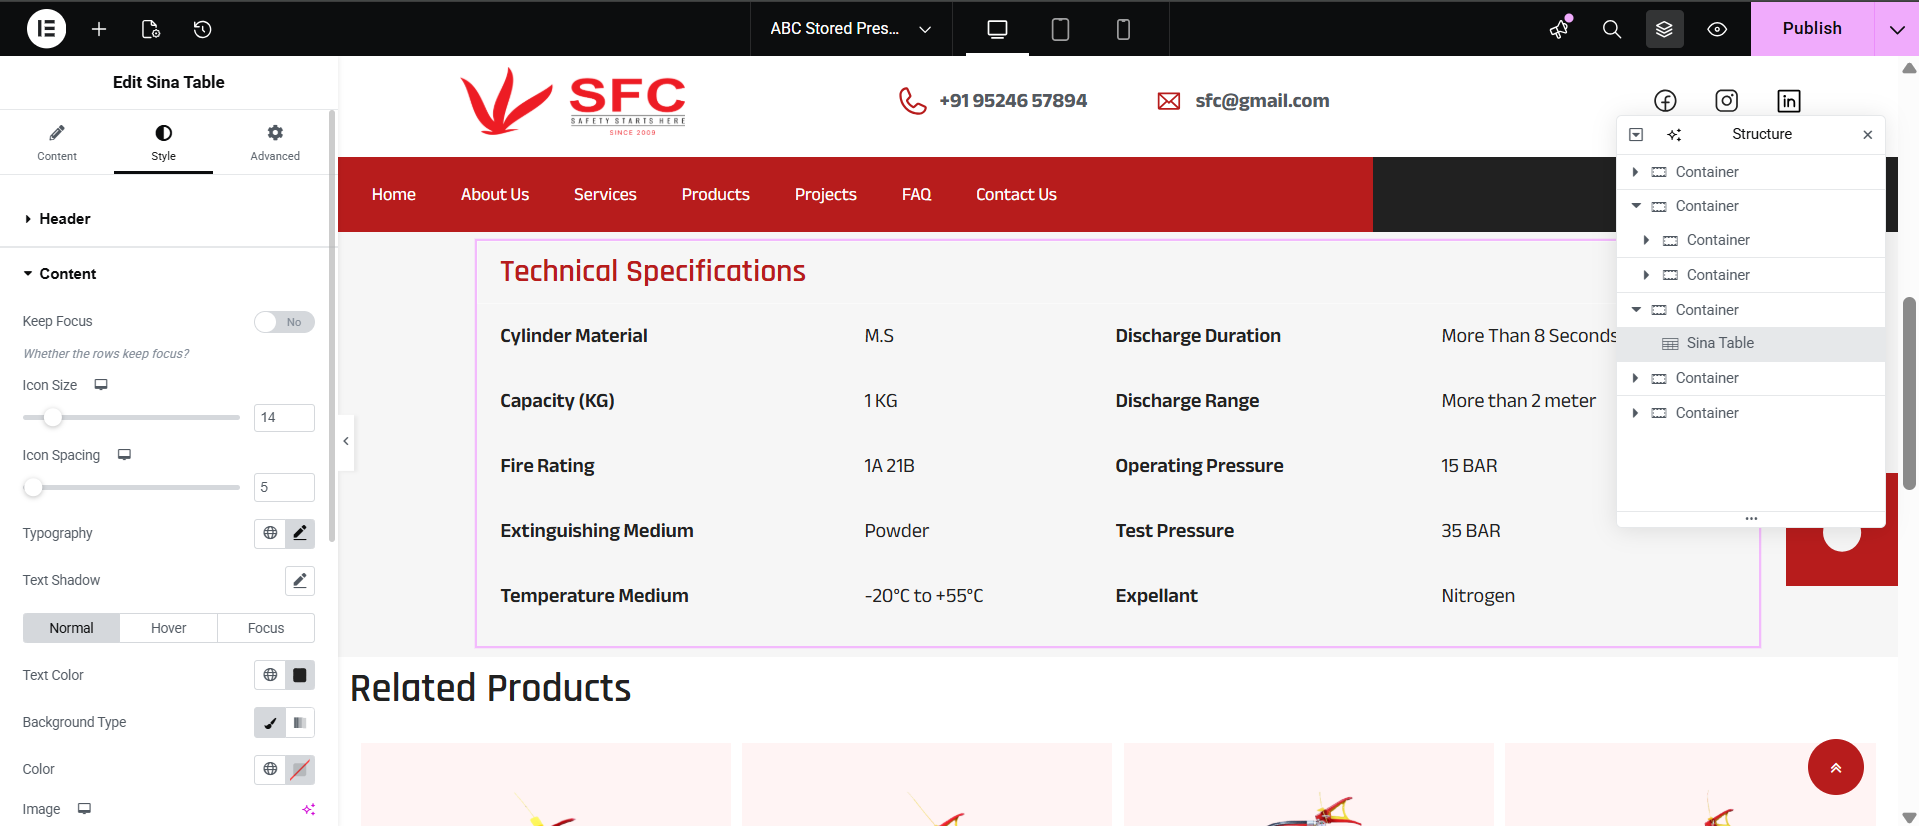
Go to the Style tab to customize appearance:
| Setting | Controls |
|---|---|
| Header Typography & Color | Change title size, font, text color |
| Row Text Style | Font, alignment, spacing |
| Borders & Divider Lines | Add border or lines between rows |
| Padding & Spacing | Adjust cell space |
| Background & Hover | Table colors & highlight effects |
5. Responsive Adjustments
Switch to mobile/tablet editor from top Elementor bar.
Adjust font sizes & spacing per device.
Ensure table layout is not breaking in smaller widths.
6. Duplicate, Move or Delete
Duplicate Table → Right-click widget → Duplicate
Move to other pages → Copy → Paste into another page container
Delete if unnecessary → Right-click → Delete