All Page Tutorial — Using Elementor


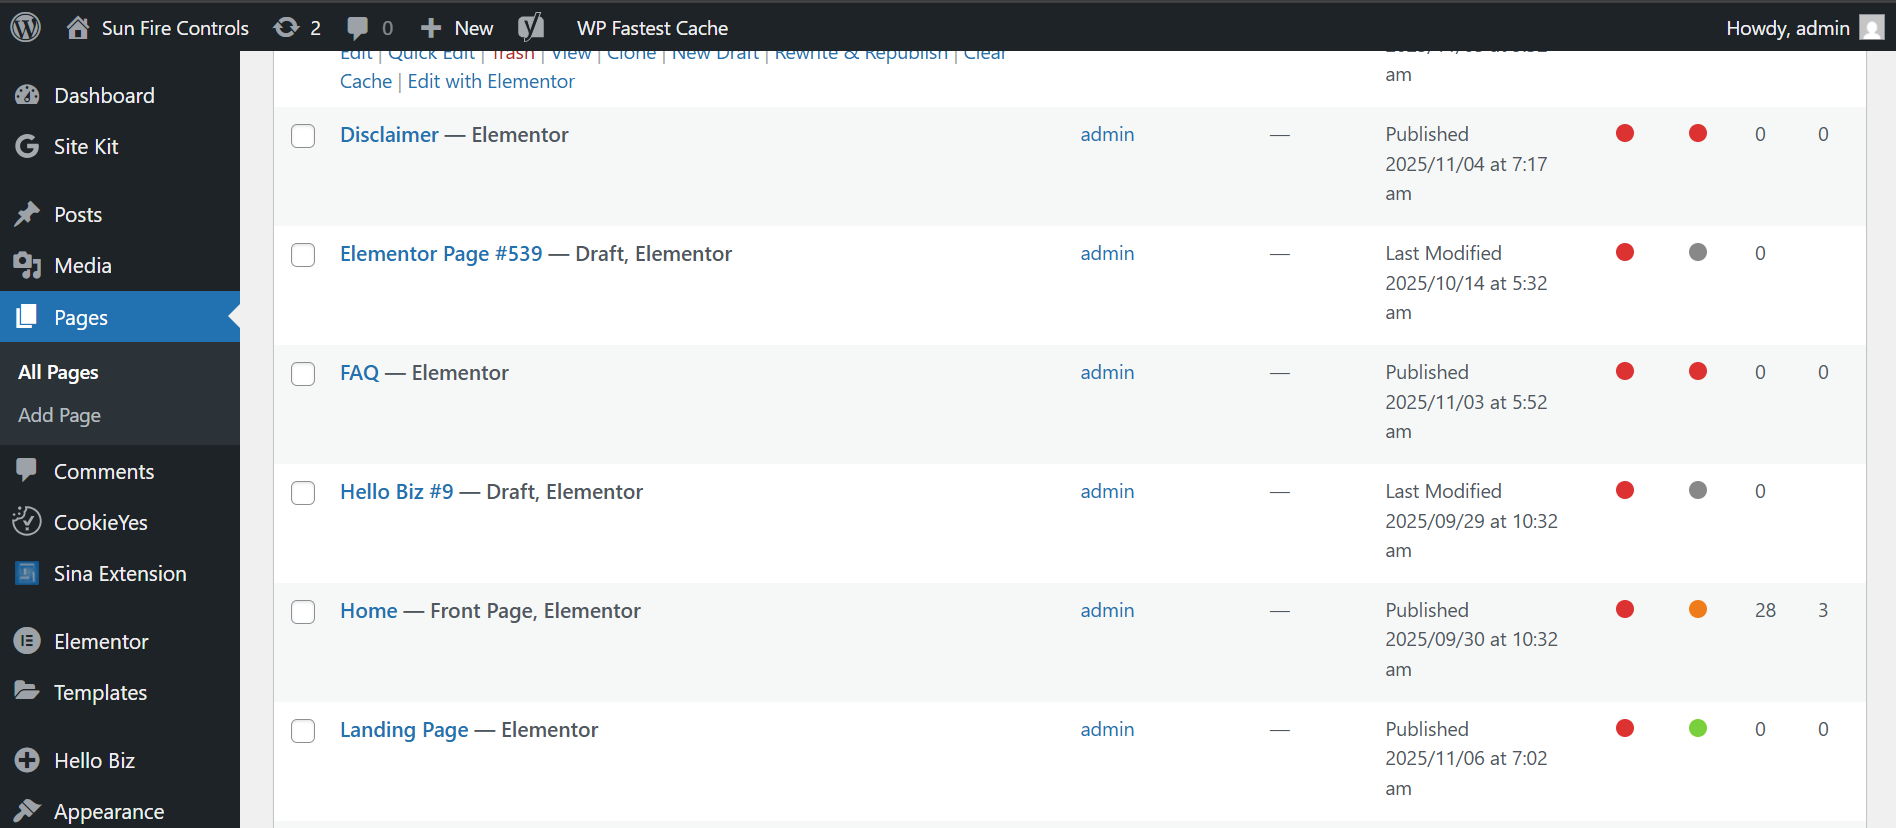
1. Locating the Page in WordPress

  • In the WordPress dashboard, go to Pages → All Pages.
  • Find the page labeled Ex : “Home” (or whichever page is set as the homepage).
  • If you don’t see “Home,” check Settings → Reading to see which page is set as the “Homepage.”
  • Click Edit with Elementor on that page.


2. Editing Content in Elementor

 
Once you’re in the Elementor editor:
 

a) Selecting a Section / Widget

  • Hover over a section; you’ll see Pink border and icons for Edit Section, Duplicate, Delete, etc.
  • Click the Edit Section (6 dots icon) to modify the section’s layout, style, padding, etc.
  • Inside the section, hover a widget (like a heading, text editor, image) and click the Edit Widget icon (pencil icon).

b) Editing Text Content

  • After clicking Edit Widget on a Text or Heading widget, on the left panel you’ll see the “Content” tab where you can change the text (title, paragraph, list, etc.).
  • Use the “Style” tab to change typography, color, spacing.
  • If needed, use the “Advanced” tab for margins, padding, motion effects.

c) Editing / Replacing Images

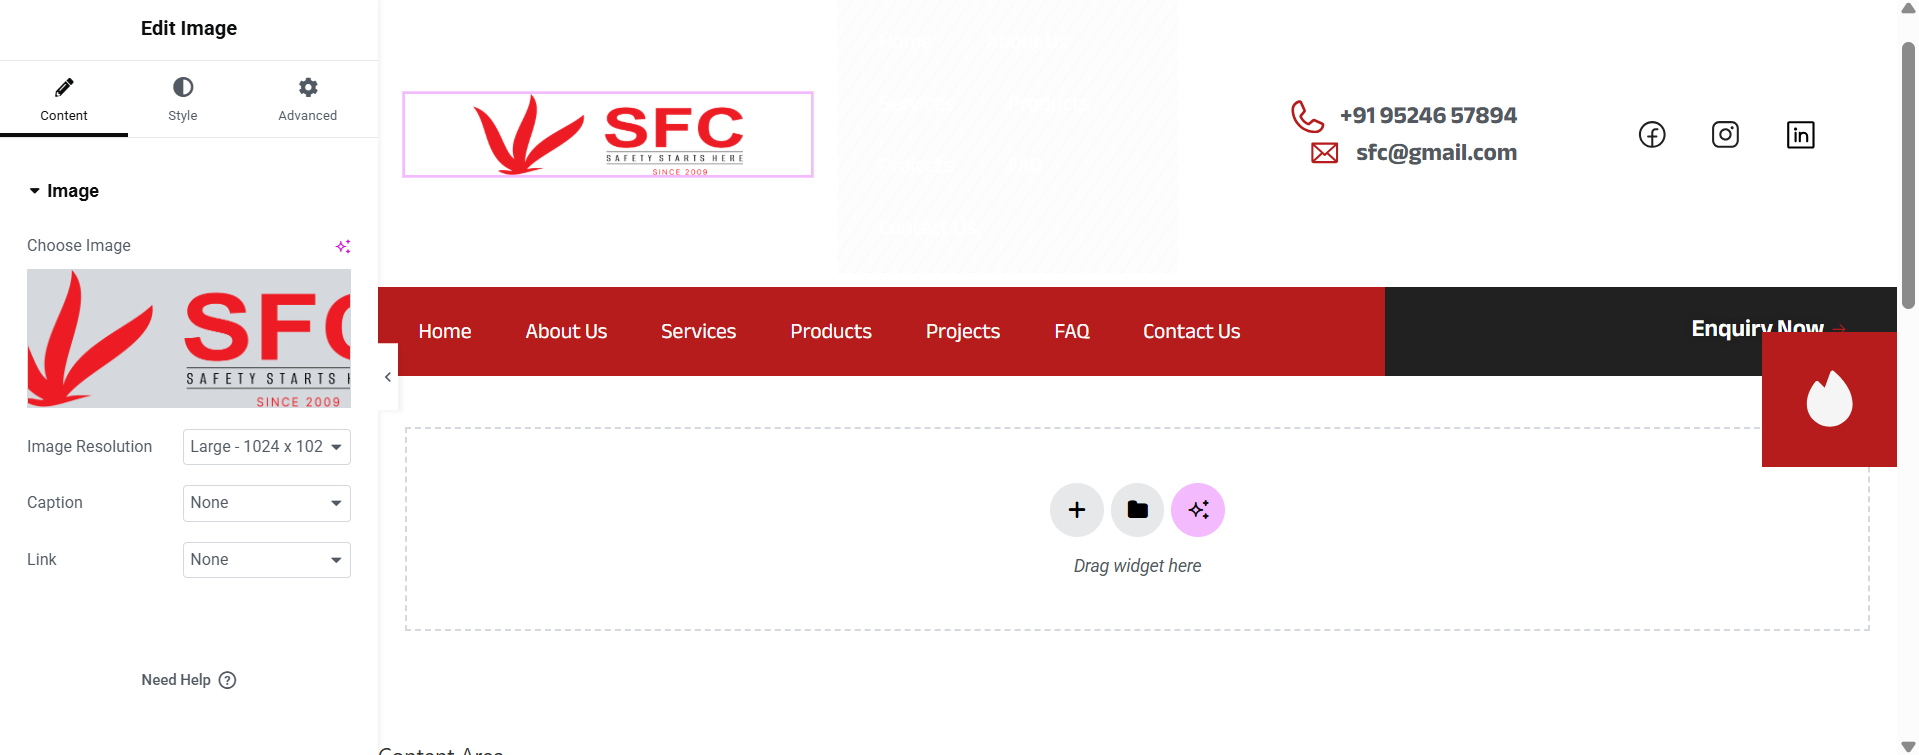
  • Click the Image widget (or the widget that holds an image) and in the left panel under “Content → Choose Image” you can pick a different image from Media Library or upload a new one.
  • You can also change the image size, alignment, caption, link, etc.
  • Under “Style,” you can add borders, shadows, hover effects, etc.
 

d) Editing / Replacing Button Content

  1. Select the Button Widget
    Click the button you want to edit. The left panel will display the Button widget settings.
  2. Edit Button Text
    Under the Content → Text field, you can change the label of the button (e.g., “Let’s Begin” → “Get Started”).
  3. Edit Link / URL
    In the Link field, enter the URL where you want the button to navigate. This can be an internal page, external site, or a custom anchor.
  4. Style the Button
    1. Switch to the Style tab to change:
      1. Text color
      2. Background color
      3. Typography (font, size, weight)
      4. Borders, border-radius, or shadows
      5. Hover effects
  5. Advanced Settings
    In the Advanced tab, you can adjust:
    1. Margin and padding
    2. Motion effects
    3. Responsive visibility (show/hide on desktop, tablet, mobile)

Save Changes
Once edits are done, click Update at the bottom of the Elementor panel to save your
changes.


3. Adding New Content / Elements


To insert new widgets or sections:

  1. On the left panel (Elementor toolbox), search for the widget you want (Heading, Image, Button, etc.).

  2. Drag & drop it into your desired section or into a new section.

  3. Configure its content, style, and advanced settings as above.

  4. To add a new section: click the “+” icon (Add New Section), choose structure (e.g. one column, two columns etc.), then drag widgets into it.

4. Deleting Sections / Widgets / Images

 
  • To delete a widget: hover over it → right-click → Delete (or click the “X” icon).

  • To delete a section: hover the section → right-click the 6-dot handle → Delete.

  • If deleting an image from the media library (sitewide): go to Media → Library, find the image, click it and choose Delete Permanently. (Be cautious — if it’s used elsewhere you’ll break that usage.)

5. Publishing / Saving Changes

 
  • After you make edits, click Publish (Top Right) in Elementor to save changes.
  • View the page (Preview Changes) to ensure it looks correct on desktop, tablet, mobile.
 
StepActionNotes / Tips
1In Elementor, locate the top section (hero)Use the navigator (bottom left icon) to find “Section – Hero” easily
2Change background image or colorClick Edit Section → Style → Background → Choose Image / Overlay
3Edit heading textClick the heading widget → change text under “Content” tab
4Edit paragraph / descriptionClick the text / editor widget → update content
5Edit button (label / link)Click button widget → Under “Content” change text, set URL (link)
6Add / remove widget in this section (e.g. add icon or link)Drag a widget (icon, text, etc.) into this section, adjust layout
7Delete a widget if not neededRight-click → Delete
8Adjust spacing / padding to make layout neatUse “Advanced” tab → padding / margin settings
9Preview across devicesUse the responsive mode toggles (desktop / tablet / mobile)
10Click Update to saveAlways save after changes

Averting Fire, Securing the Future

India is a rising economic power that cannot afford to sacrifice 25000 citizens and nor burn close to 1000 crores at the altar of fire each year. 45% of the insurance claims arise due to fire accidents as per data. Sun Fire Controls ensures that such disasters are averted and invaluable assets remain secure.

02

Quality Assured, Standards Complied

As per the Quality Control Order (QCO), all our products are ISI-certified and meet the standards that are stipulated by the Bureau of Indian Standards (BIS). We ensure adherence to the regulations laid down by the Tamil Nadu Fire and Rescue Services Act, 2025 and the National Building Code (NBC) guidelines.

03

Expert Installation and Maintenance Services

Sun Fire Controls has a team of experienced professionals at your service. The team provides both installation and maintenance services.

04

Certified Equipment and Expert Personnel for Complete Protection

Sun Fire Controls employs trained personnel and procures globally-certified fire safety equipment to ensure complete protection for every building we secure.

05

Get Fire Safety Solutions

Get Fire Safety Solutions